DOW BlueCor Fan-Fold and Owens Corning Pink Fan-Fold Flying Wings
Fan-fold foam, usually used for insulation, can easily be used to make RC airplanes. This foam can be folded over to form the top and bottom surfaces of a normal airfoil and provide great strength, but still remain very light. I have personally built twelve of these flying wings using DOW BlueCor and Owens-Corning pink fan-fold. Additionally, I have helped members of my RC club build another fourteen Pink Wings.
The first section of this page shows the 6' wingspan pink wings that have been build as part of our club Pink Wing project, and the 5.5' to 9' wingspan wings I have built for other projects.
The building instructions for the 6' wings are here. Details on the electronics are here. The foam that can be used is detailed here.
The second part of this page shows the internal construction of the various wings that I have built.
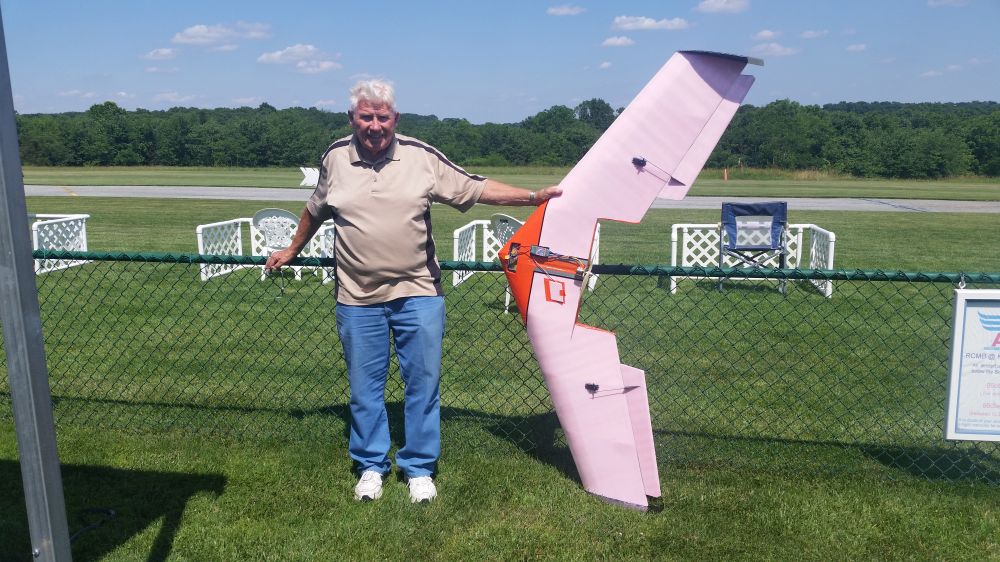
Updated: November 2023: New Pink Wing Flyer
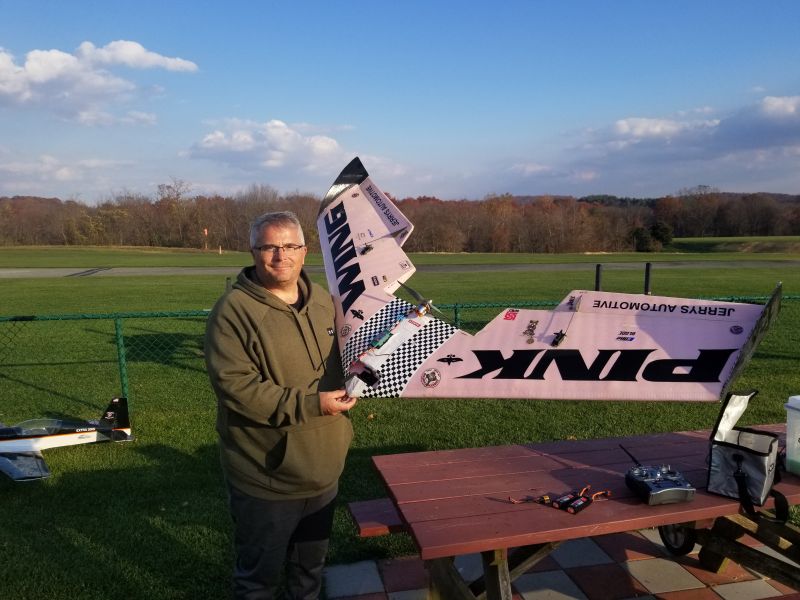
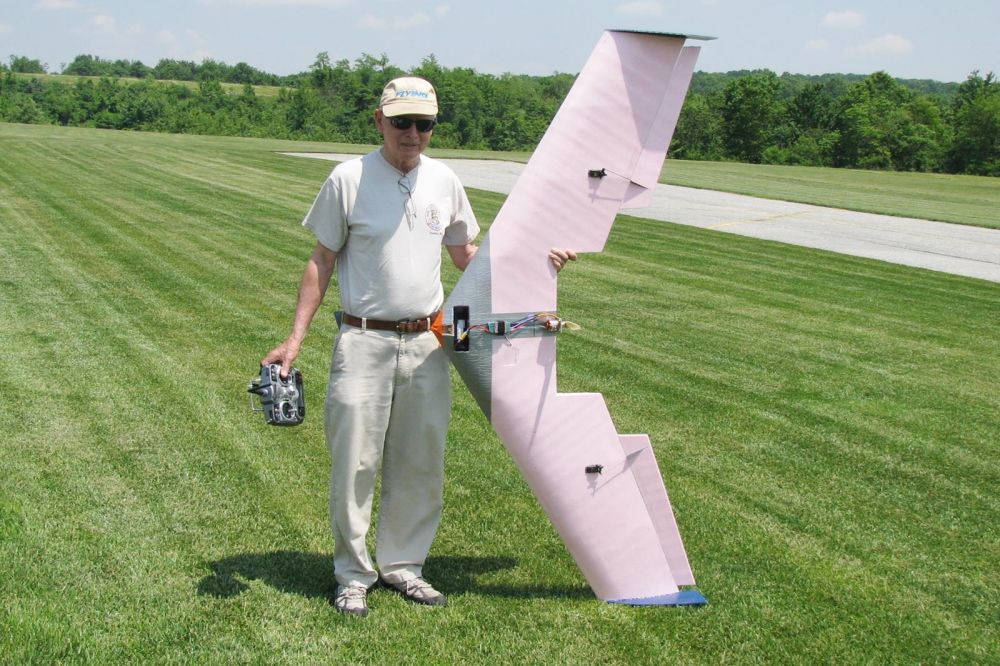
Jerry sold his pink wing to Jeff, a new flyer at RCMB. Jeff's maiden flight with his wing was on 11 November 2023.
Updated: December 2018: 5.5' Pink Wing and 7' Pink Wing
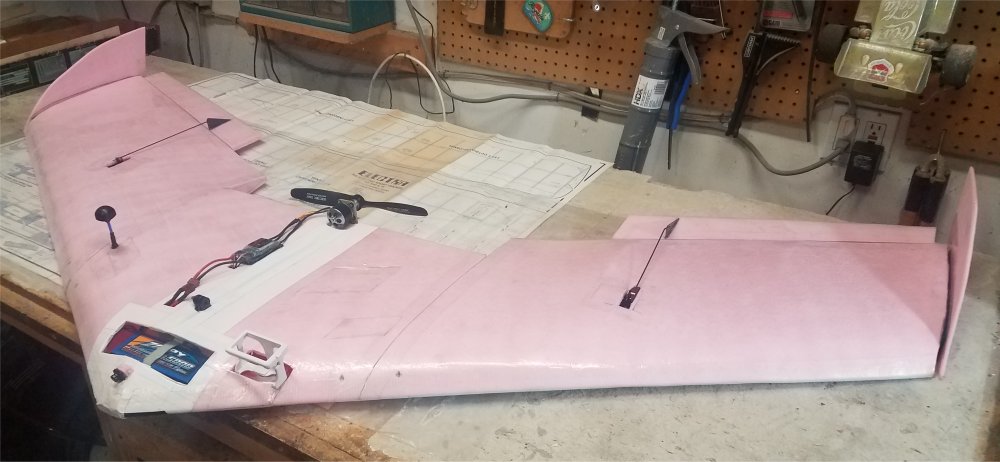
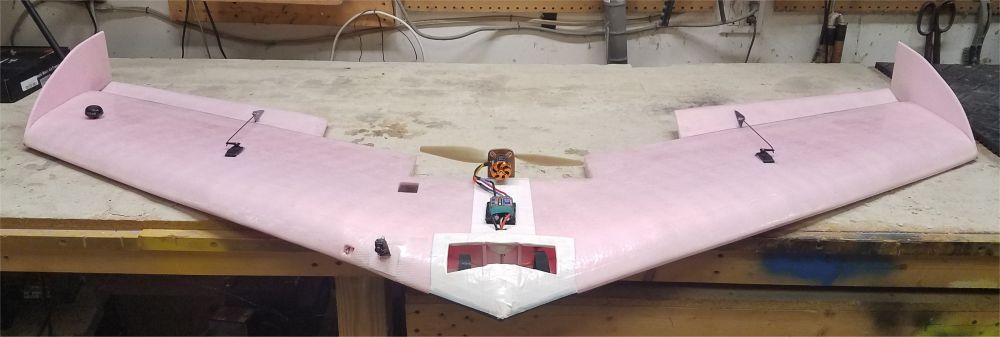
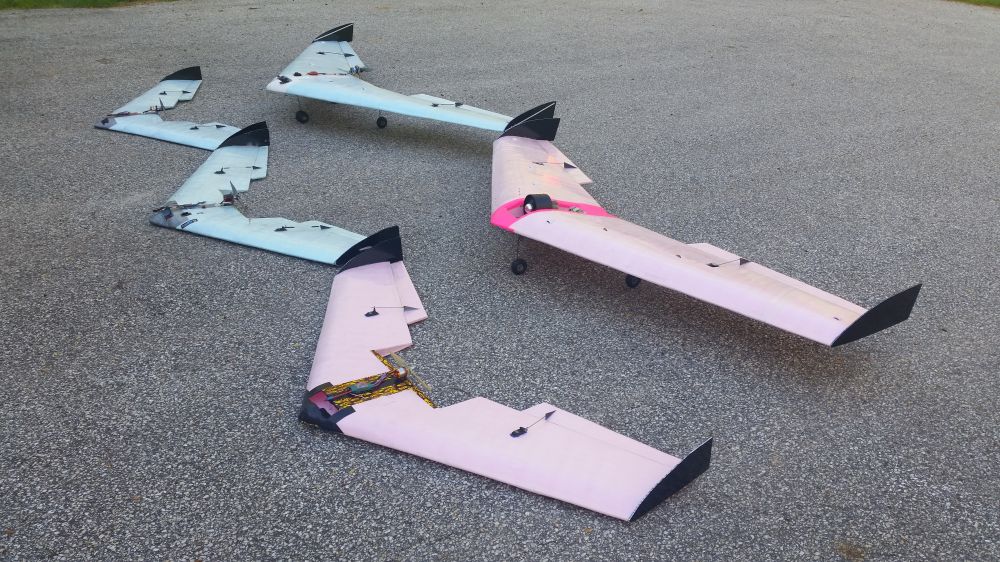
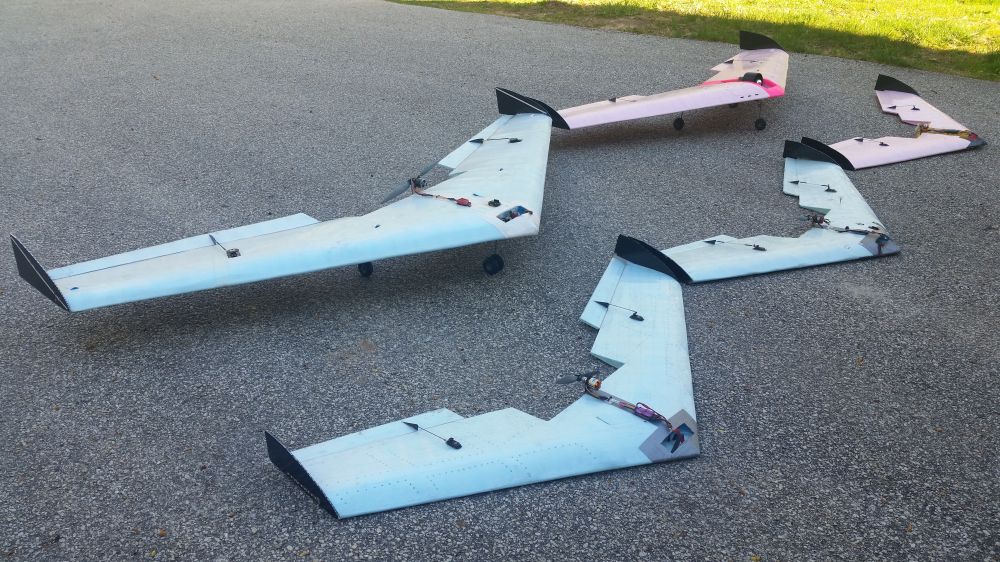
I used the last scraps of the remaining pink foam to build two more flying wings. The 5.5' wingspan version is powered by a 480 outrunner with a 40A ESC, and the 7' wingspan version is powered by a G25 outrunner with a 50A ESC. Both wings have GoPro mounts in the nose, with removable lead weights over the mounts. When I fly with a GoPro in place, the lead weights are removed. The 7' wing has been outfitted with FPV equipment and a Flip32 F1 flight controller running iNav software.
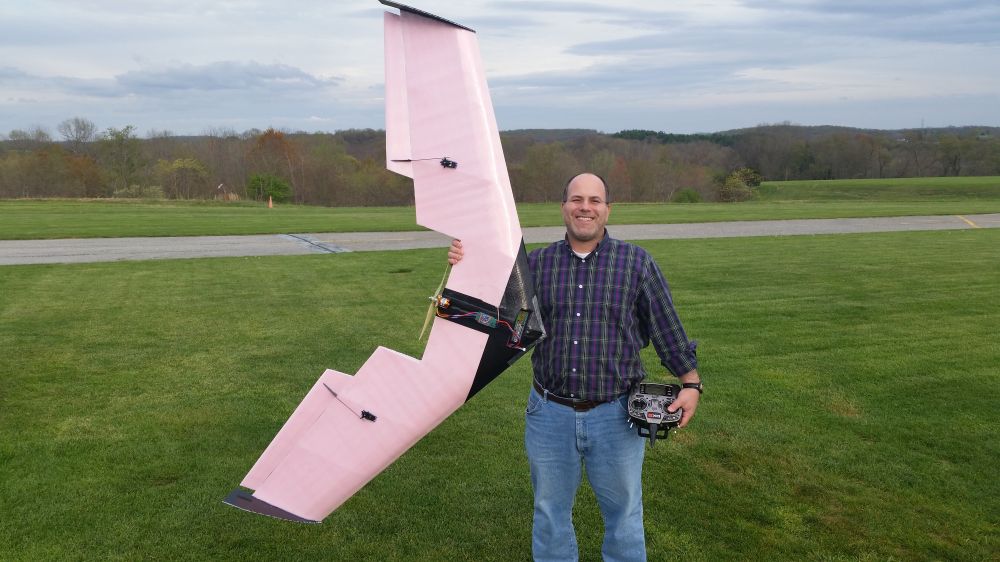
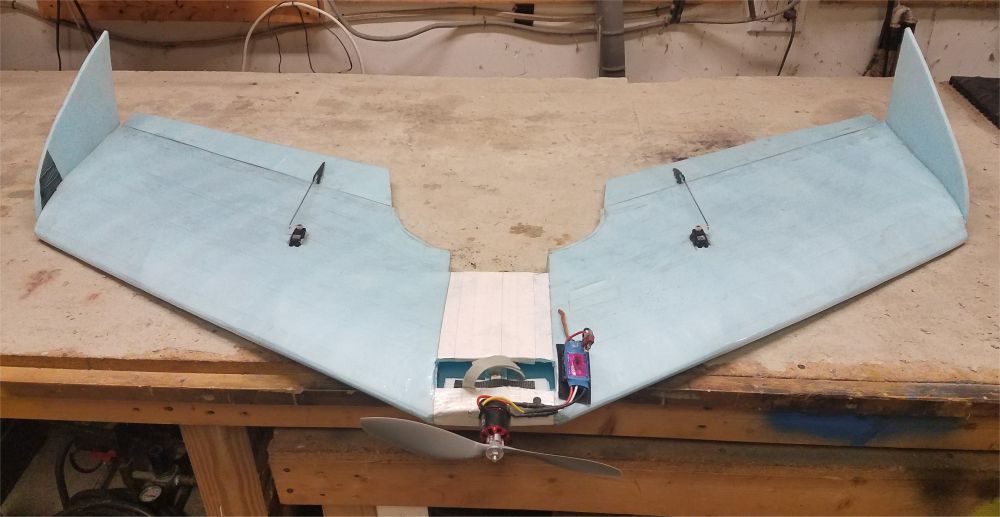
5.5' Pink Wing

7' Pink Wing
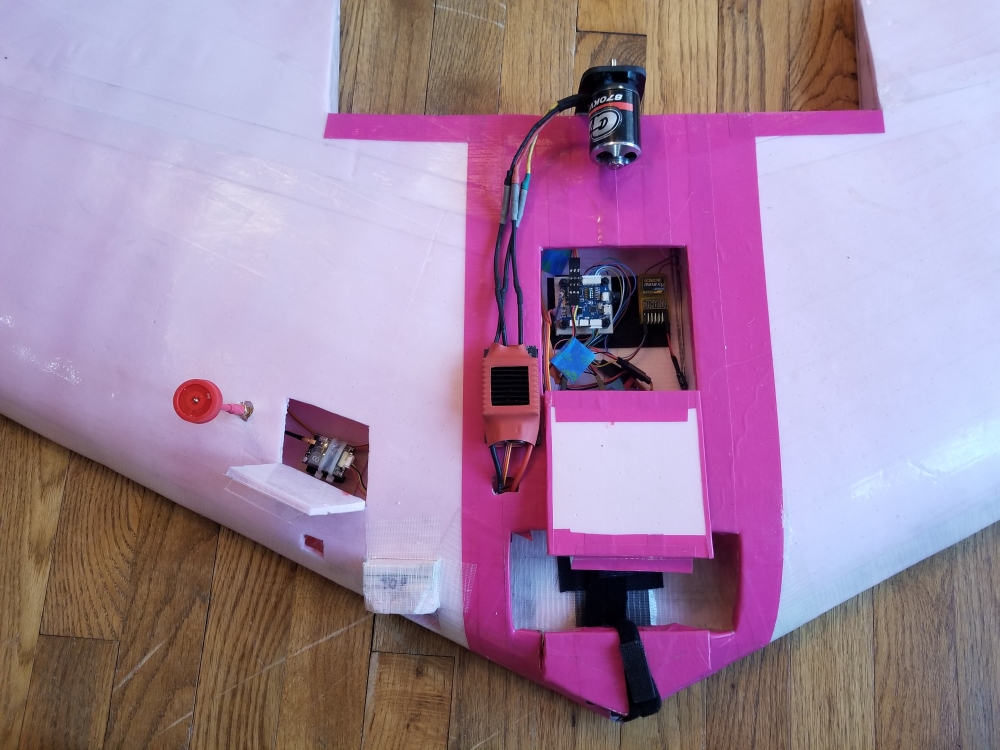
7' Pink Wing FPV Equipment and Flip32 Flight Controller
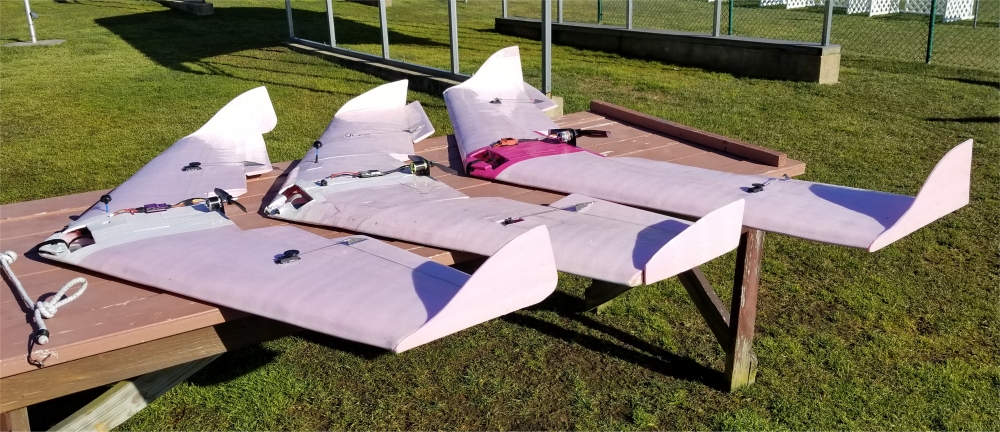
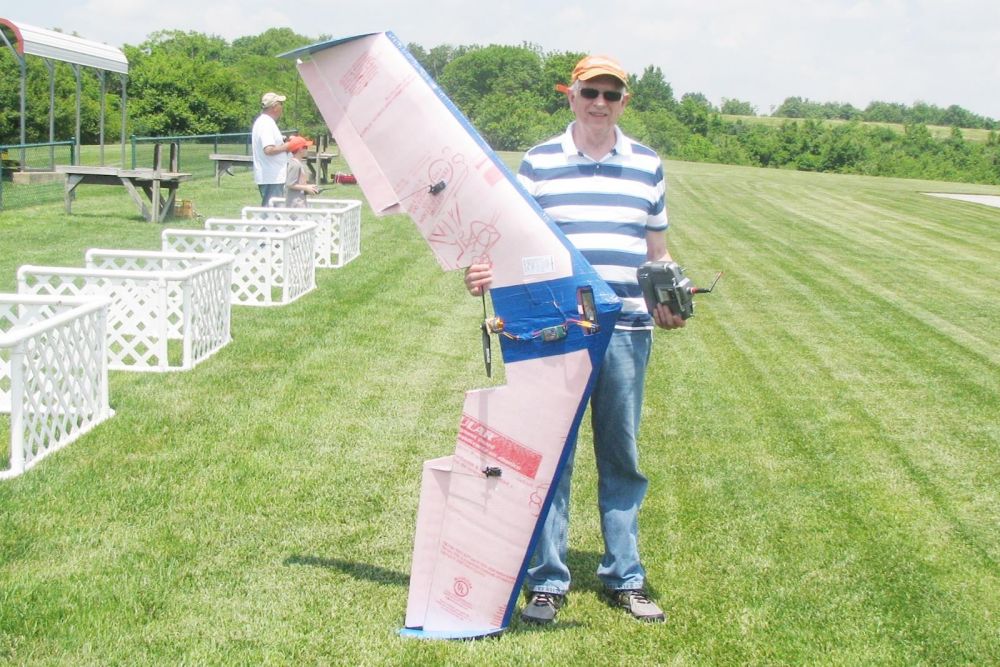
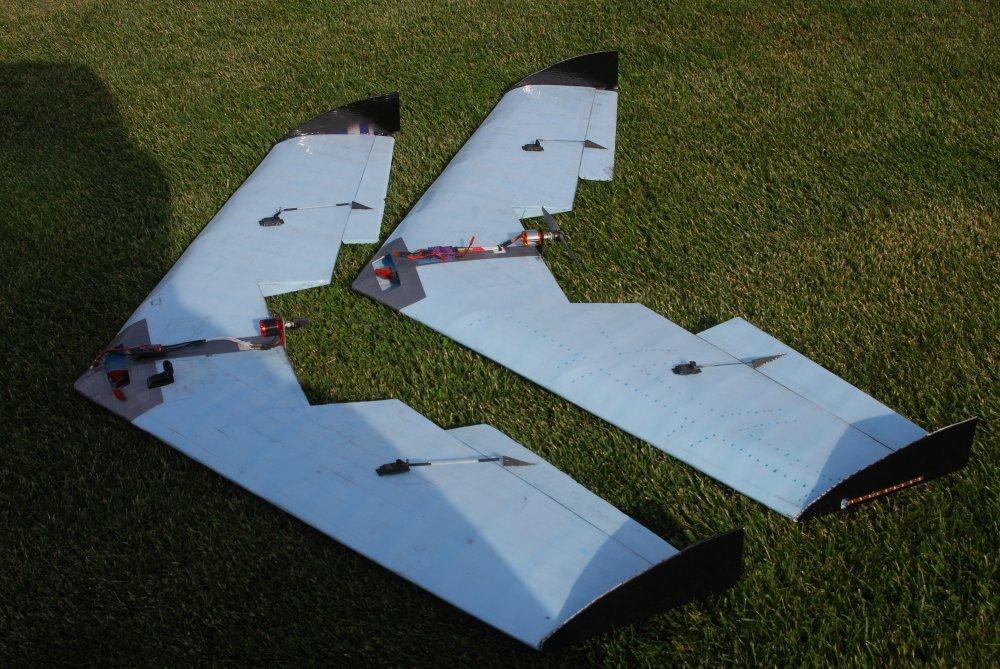
From left to right: 5.5' Pink Wing, 6' Pink & Blue Travel Wing, 7' Pink Wing
Updated: April 2018: 6' Pink & Blue Travel Wing
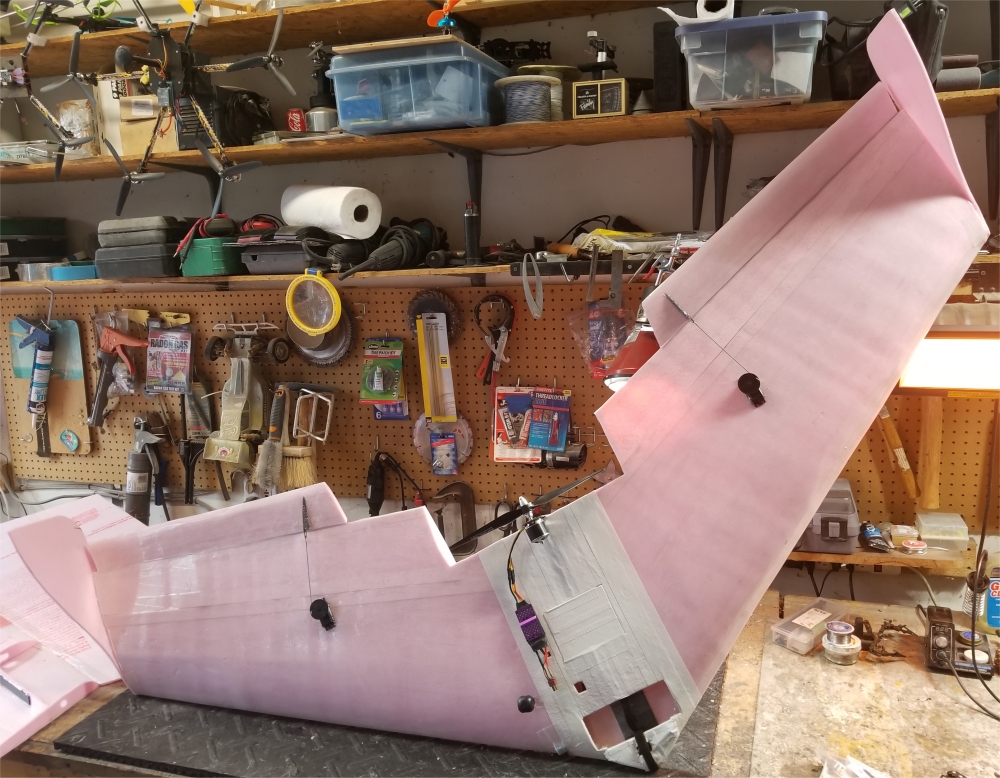
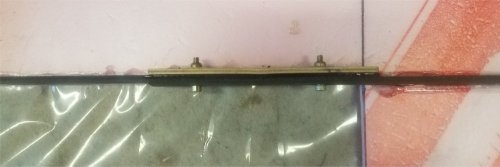
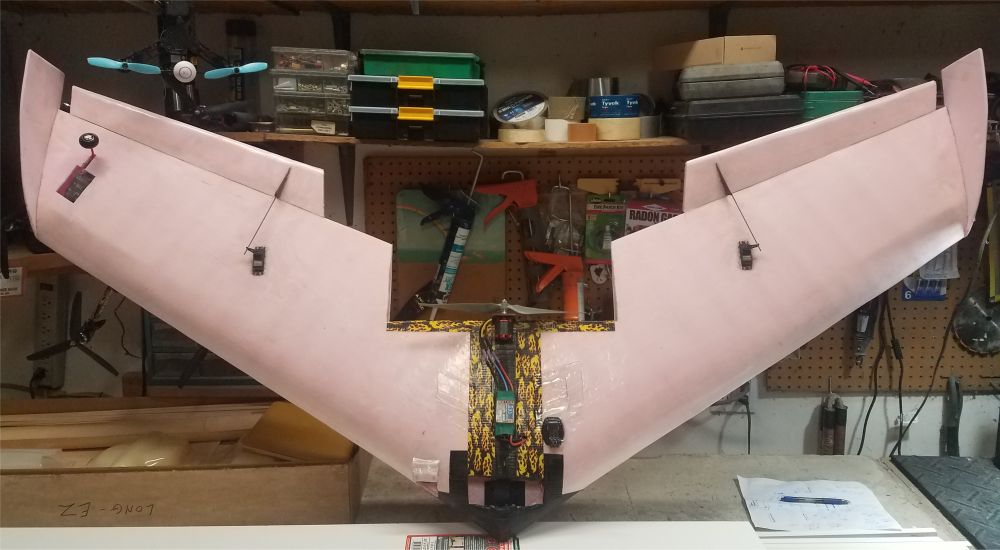
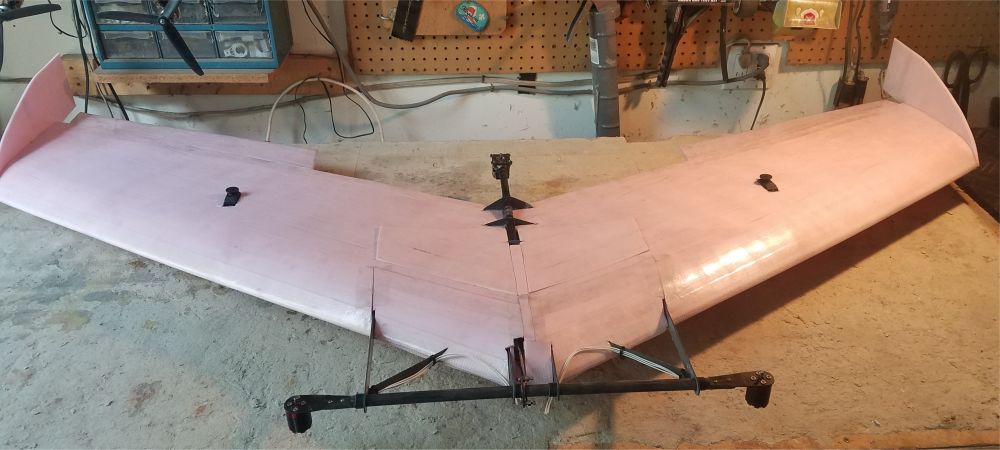
I have built another pink wing for FPV use. This wing is a traveling wing because it can easily be taken apart into three sections or put together. The construction is the same as all the other wings, except that the front and rear spars are joined in three pieces with bolts and blind nuts. There are two bolts on each spar, for a total of 8 bolts holding the wing together. With the bolts tighted down into the blind nuts, there is no play at all and the wing is as solid as all the others I have built. The spars were cut to the correct lengths, joined at the correct places, and then the whole things was built as normal from my standard templates from pink foam, except for the blue foam used for the lower left wing surface. This wing received all the normal electronics I use for FPV aircraft; RC receiver, a Flip32 flight controller with OSD hardware, GPS, camera, and video transmitter. It also has a GoPro mount in the left leading edge and a Gear360 mount in the top center.
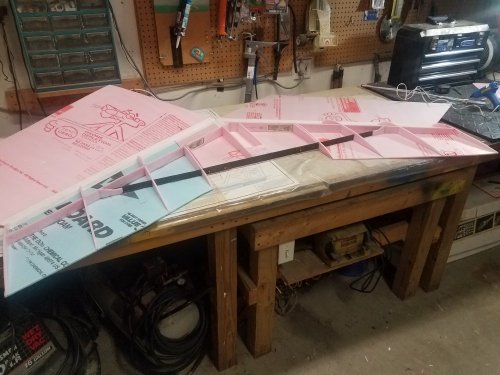
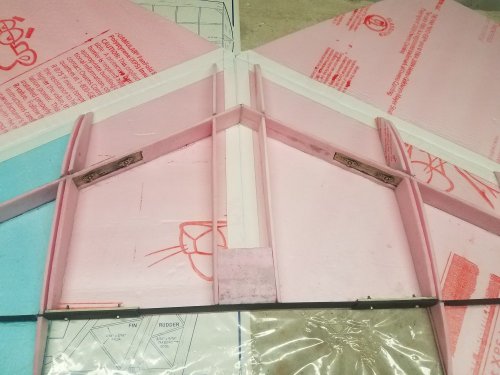
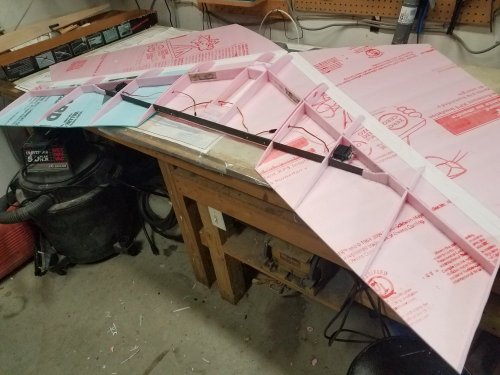
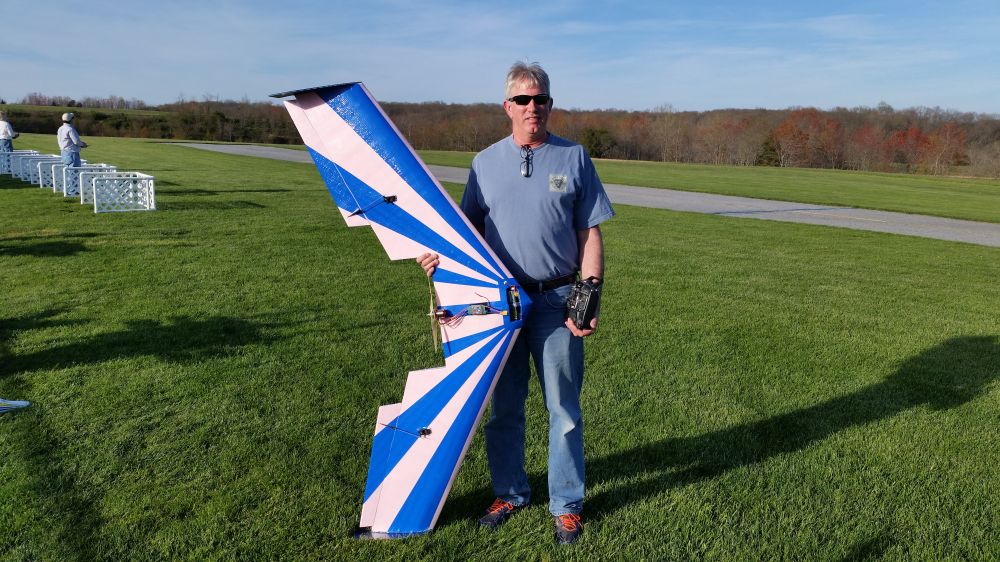
6' Pink Travel Wing
Updated: October 2017: 6' Pink Wing conversion to FPV Wing
I have converted the pink wing I built as part of the group build in 2016 to a second FPV flying wing with similar capabilities to my first FPV flying wing. Details on this second FPV flying wing are here at this page.
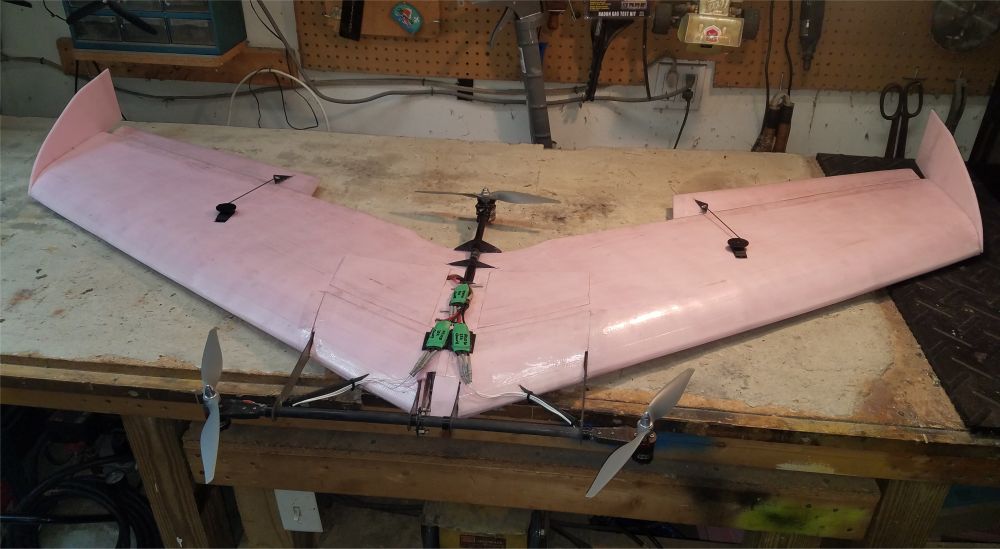
Updated: May 2017: 6' VTOL Pink Wing
I have built yet another pink wing; this one is a VTOL tri-copter that transitions from hovering to forward flight. This wing is detailed on this page as the final step in my tilting tri-copter project.
Updated: April 2017: 6' Pink Wing FPV with EagleTree
I have built a new pink flying wing with FPV equipment and an EagleTree system. Details are here at this page.
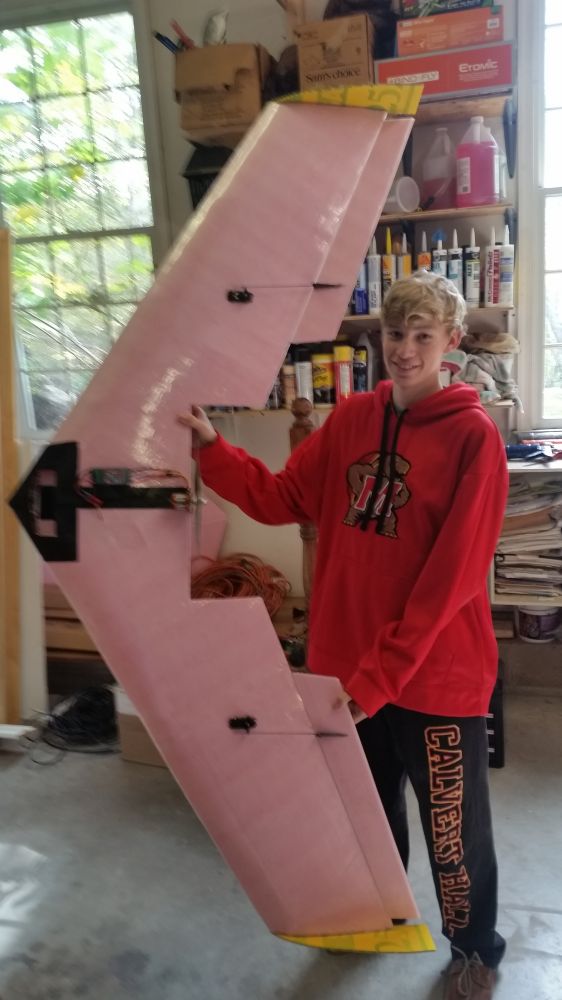
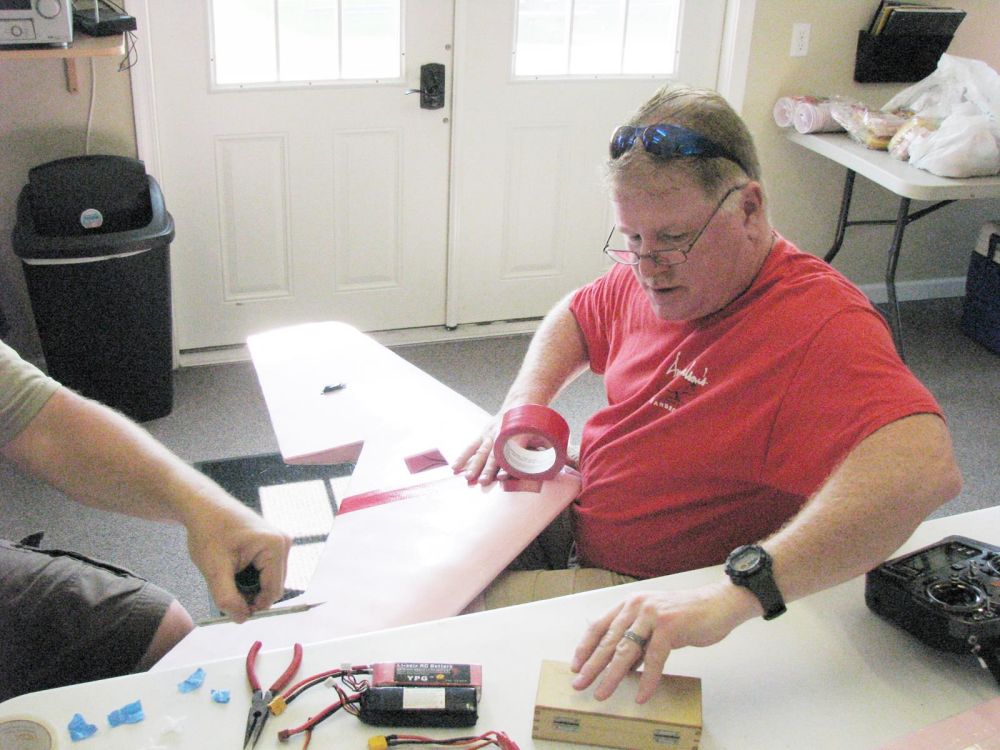
Updated: Saturday, 22 August 2016: 6' Pink Wing (#14) for high school engineering project
Cole Martin, a senior at Calvert Hall High School, finished building the 14th pink wing for his senior capstone project. The winds were too high to fly the plane today, so we will try for a maiden flight next weekend. Addition: Several flights were made in late August and early September 2016 to teach Cole how to fly RC.
Updated: Saturday, 26 June 2016: 6' Pink Wing #13
Pink wing #13 had its maiden flight today, and then a second flight a bit later. That is the last pink wing from this group build session. If there is enough interest, we can have another group build.
Updated: Monday, 30 May 2016: More 6' Pink Wing photos from club build
Here are several more photos from the Spring Fling on Saturday, provided by Clarence Williams.
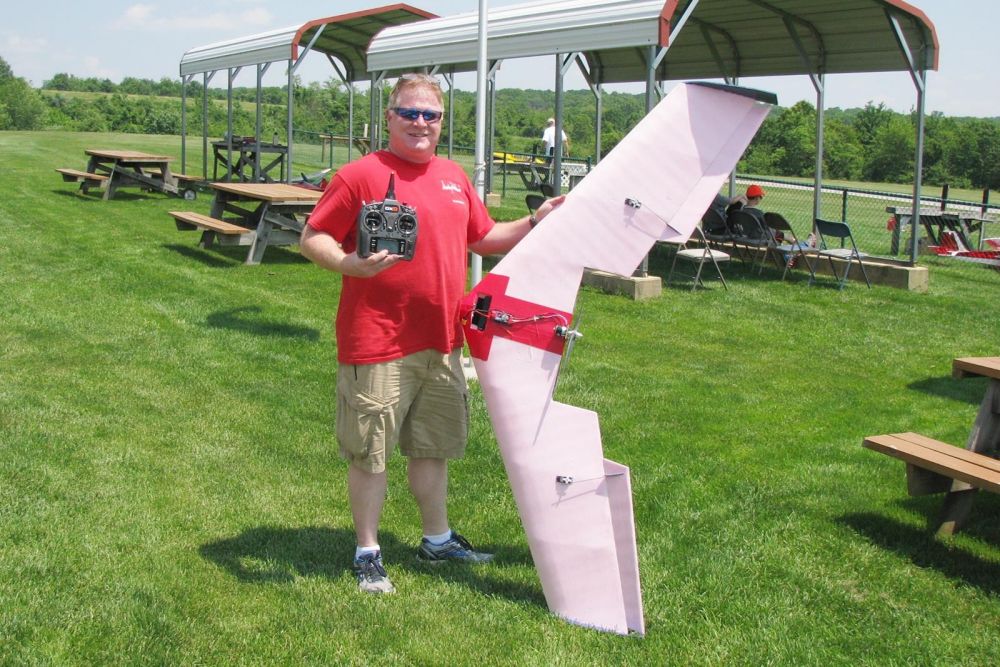
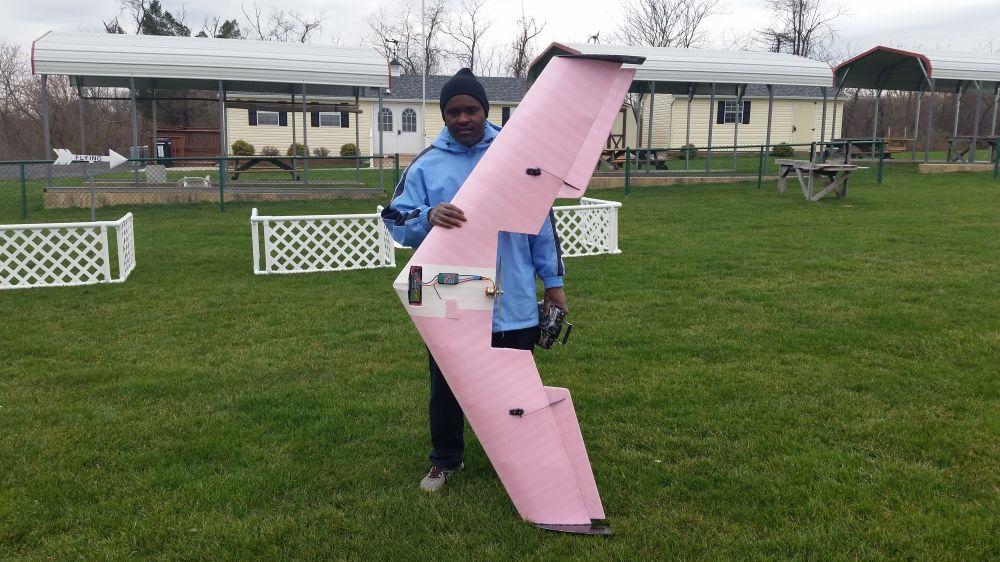
Updated: Saturday, 28 May 2016, Spring Fling: 6' Pink Wings #10 - #12
There were three more maiden flights today at the field, and all five wings present were in the air together. That makes 12 pink wings that have flown. One more to go; guess who will be #13 ?

Updated: Saturday, 30 April 2016: 6' Pink Wing club build video
I have edited video together of the group build and posted it to YouTube here.
Updated: Friday, 22 April 2016: 6' Pink Wing Club Build #9
The ninth pink wing has now flown.
Updated: Monday, 18 April 2016: 6' Pink Wing Club Build #8
There was another maiden flight this evening after work. That makes a total of eight pink wings that have flown.
Updated: Saturday, 16 April 2016
Six 6' pink wings and the 8.5' ducted fan wing were at the field today. There were two more maiden flights, and three or four were in the air together. Thank you to Clarence Williams for the photos.
.jpg)
.jpg)
.jpg)
.jpg)
.jpg)
.jpg)
.jpg)
Updated: Saturday, 02 April 2016
There were three maiden flights at the field today.

Updated: Thursday, 24 March 2016
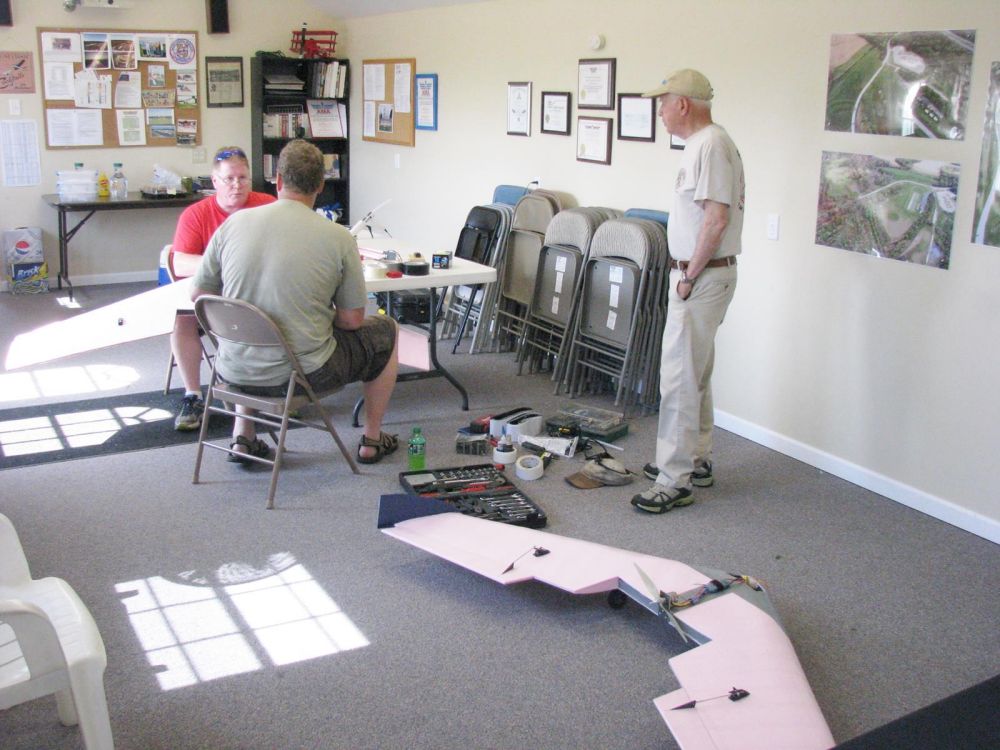
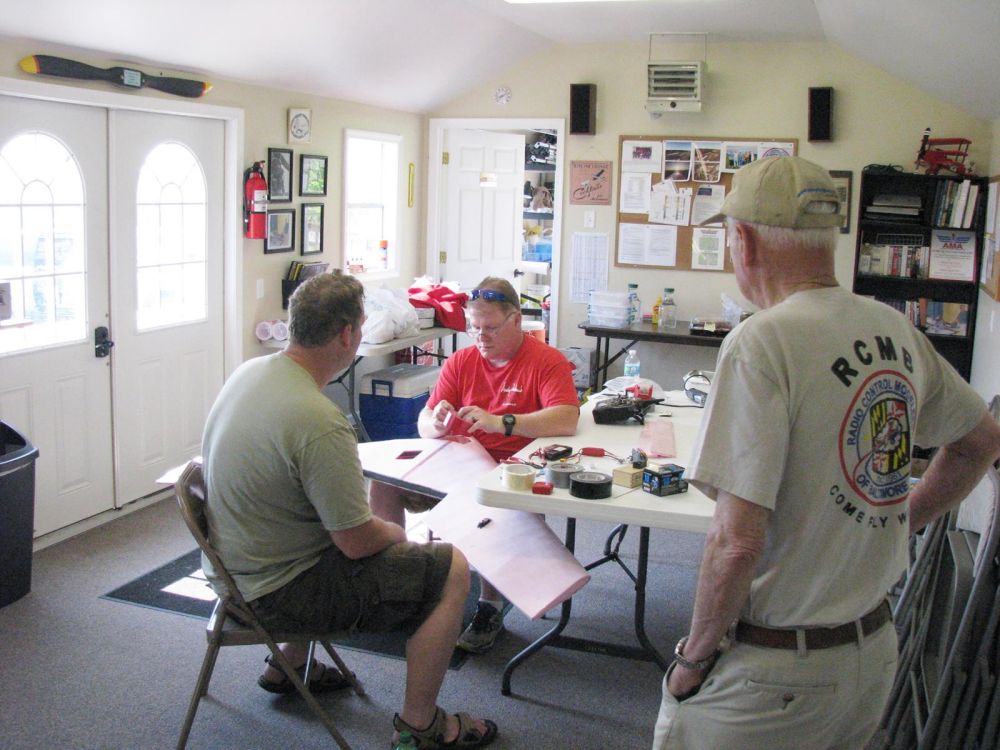
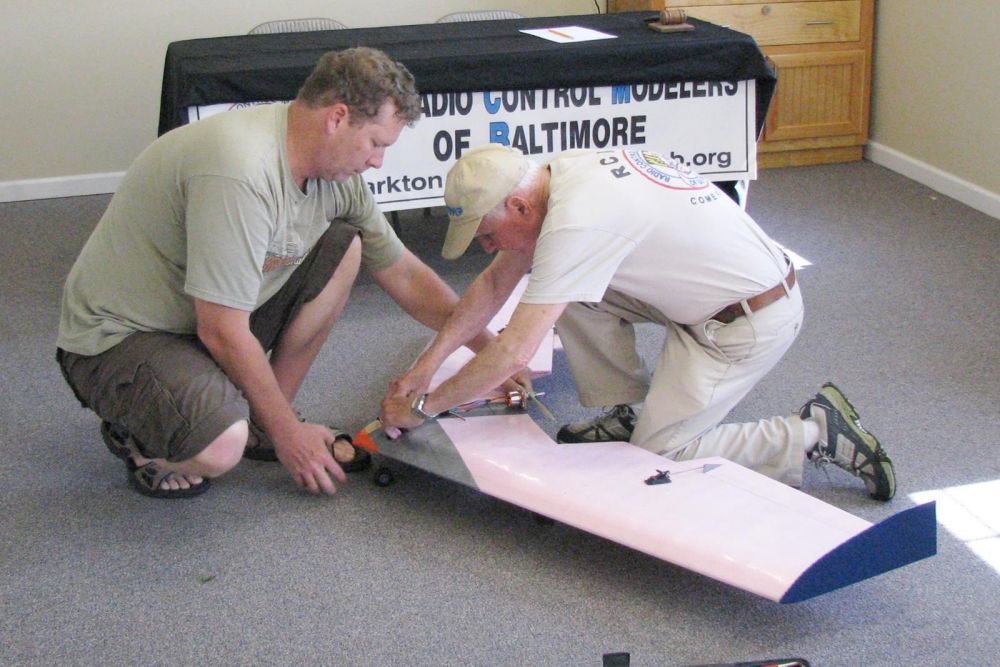
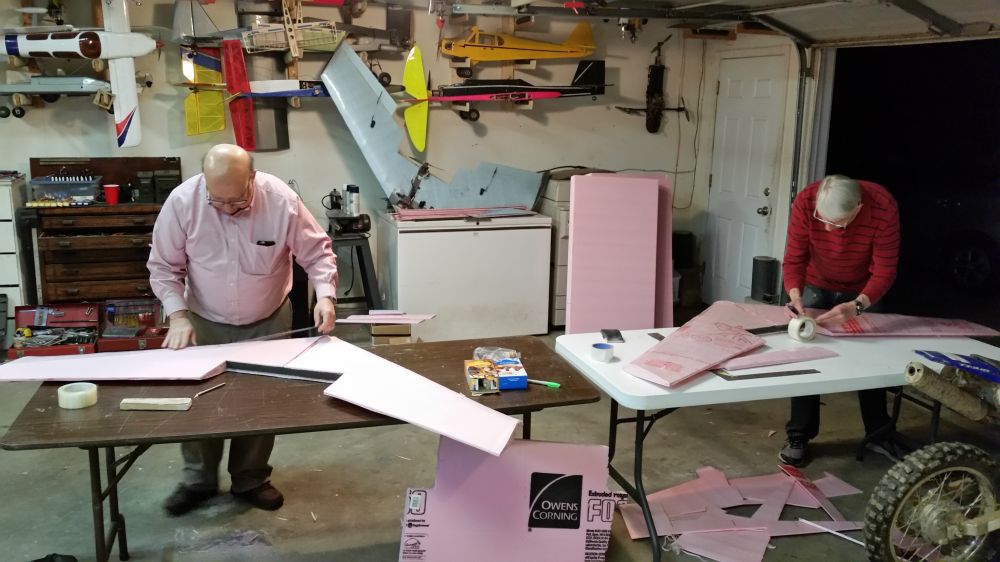
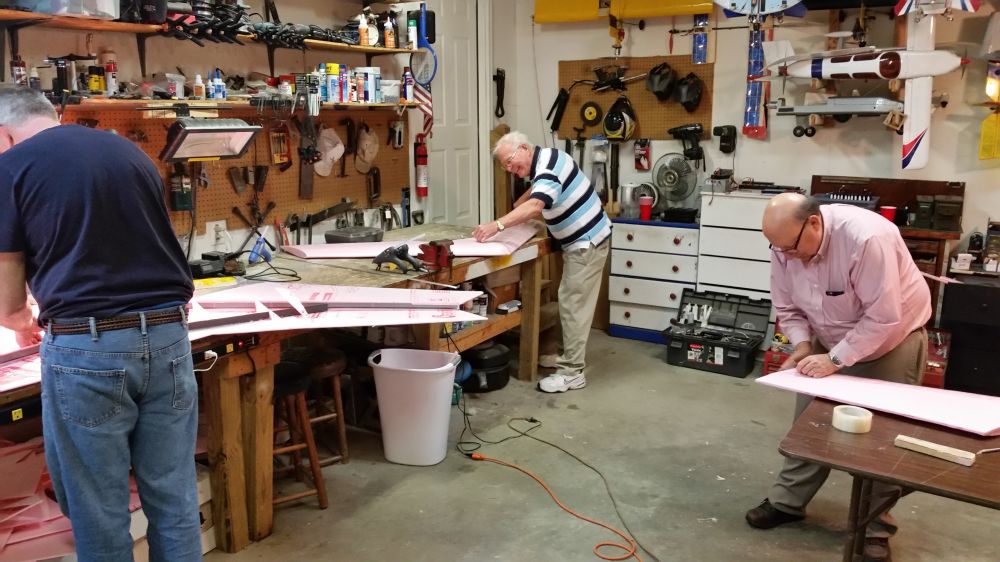
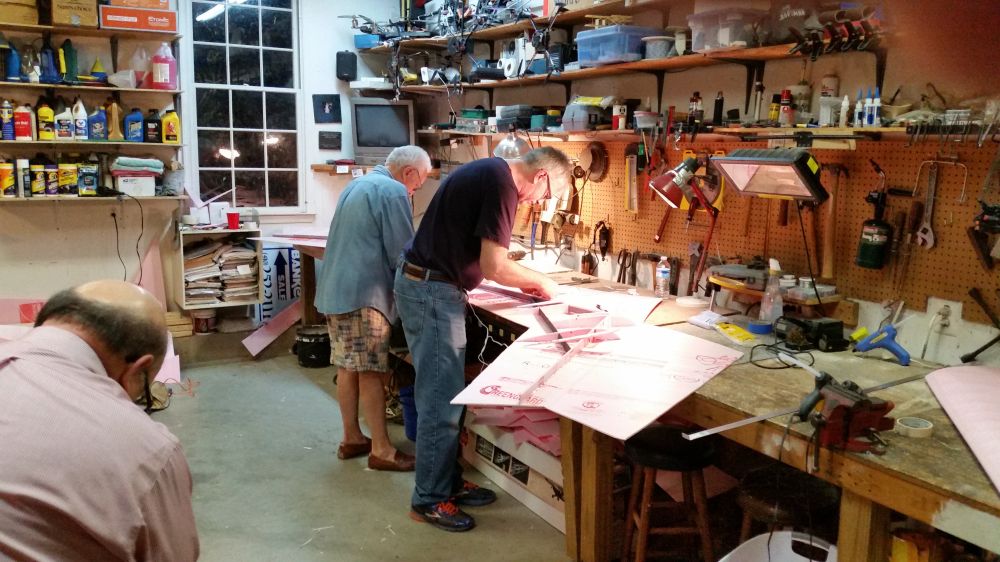
The second group build session was attended by five flyers. Three more planes were almost finished, and two more were begun.
Updated: Sunday, 20 March 2016
The first pink wing is done and flying. Jerry started building his plane on Saturday
after the club meeting at the first group build session, and finished his plane on Sunday morning. He had
two flights on Sunday afternoon.
Updated: Saturday, 19 March 2016
First build session was attended by five flyers on Saturday after the club meeting. Two planes were almost finished, two were completed far along, and the fifth plane was started. Video was shot and will be posted after some editing.
Updated: Sunday, 13 March 2016
The first of the three orders has been received. That was fast! It was shipped from the US East warehouse. One of the motors was missing - I ordered 10 motors, but the box only arrived with 9 motors. I have made a claim to Hobby King. They are now out of stock in the US East warehouse, but I will figure something out.
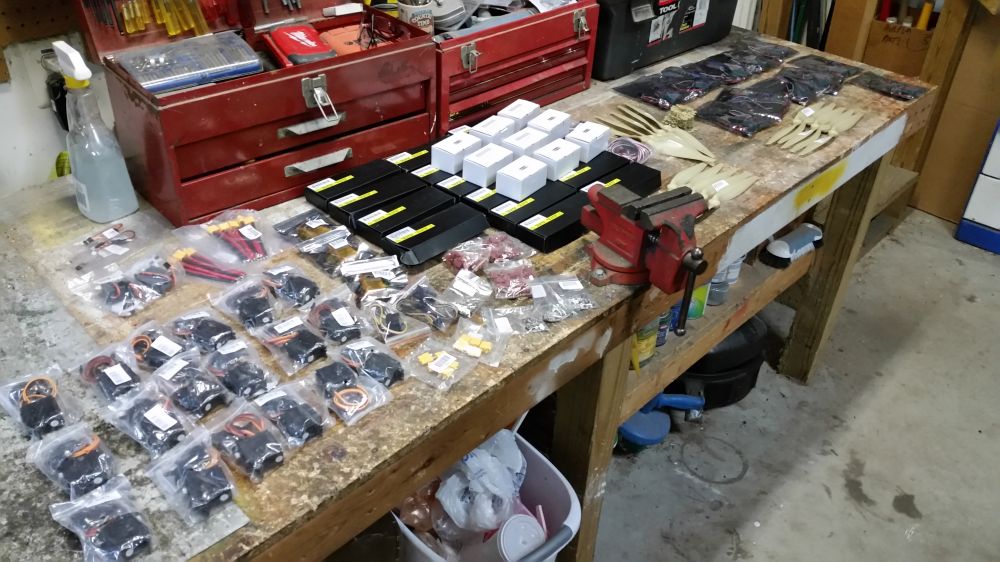
The second order has the Spectrum receivers, and the third order has the Futaba receiver. I will schedule the first build session in about a week.
Fan-fold foam flying wing building instructions
In the mean-time, here are the building steps for the wings we will follow. Tools and parts that will be needed or help:
- If you bought your own electronics, bring them; Rx, servos, servo extensions, motor, esc, battery, connectors
- Bring your transmitter. We will be binding your receiver to your transmitter, and taking the plane for a test flight on the build day.
- I have four hot melt glue guns and glue, but please bring a glue gun and glue if you have any.
- I have several X-Acto knives, but please bring an X-Acto knife if you have one.
- I have black and white duct tape for markings. If you want a different color, please bring appropriate duct tape.
- The wing tips are made of corrugated plastic from realtor signs and will be
painted to cover the words on the signs. I have black spray paint for those
wing-tips. If you want a different
color, please bring appropriate spray paint.
Note that light colors will require many coats to cover lettering.
Pink Wing Group Build
CF = carbon fiber
All glue is hot melt glue except as noted for CF on main foam spars, which is done with
Gorilla Glue.
Pre-work for Chris:
-
Left & right main panels –
cut out as templates (x2)
-
Left & right spars – cut
out, sand CF sharp edges, glue on CF to foam spars (x28) with Gorilla Glue
-
Left & right wing tips – cut
out as templates (x2)
-
Left & right elevons – cut
out as templates (x2)
-
All ribs – cut out as
templates (x5) – 5 ribs on each side, identical on each side
-
Rear center rib doubler –
cut out as template (x1)
-
Motor mounts – cut out,
laminate CF and lite-ply, cut out mounting holes (x14)
-
Elevon control horns – cut
out, drill pushrod holes (x28)
-
CF rear spar – cut to length
and sand sharp edge (x14)
-
Solder ESC to motor plugs -
as example
-
Solder ESC to battery plug –
as example
-
Solder battery plug – as
example
-
Motors – reverse shafts to
pusher config (x10)
As a group during build sessions:
Cut out wing tips using wing tip templates. Mark areas to be painted, and spray
paint. Set aside.
Cut out left and right main panels using templates.
Tape seems of main panels with transparent duct tape, inside and out.
Join main panels.
Mark main panels for spars.
Glue main spars (with already glued CF) to bottom panel.
Use lots of glue at center where main spars meet.
Glue rear CF spar to bottom panel.
Ensure it is vertical, as the engine will be mounted to rear CF spar, and the
thrust line will depend on the rear CF spar angle.
Use lots of glue where center spar attaches to main spars at each end.
Cut out rear center rib doubler using template.
Glue rear center rib doubler to bottom panels and rear CF spar.
Flip wing tips – paint other side.
Cut out ribs (10 total for each plane, 5 on each side) using templates.
Mark panels for ribs.
Install ribs, cutting vertically as needed to fit in front and behind main spar
and rear CF spar.
Cut off excess from bottom center panel behind rear CF spar.
Connect servos to extensions.
Bind receivers. Set switches for
delta wing.
Attach servos to receiver. Test servo operation.
Install servo extensions to wing, blue tape in place.
Mark location on trailing edge, measure forward to connector.
Add additional custom wiring as might be needed for FPV or external lights.
Add Velcro for Rx to left center bay.
If using stabilized Rx:
-
servo
wires go to left center bay
If using gyros:
-
Gyros are installed to right
center bay at angle
-
Servo wires go to gyros in
right center bay
-
Shrink wrap servo wires to
gyro inputs
-
Join gyro gain wires into
single connector
-
Gyro wires (left, right,
gain) run to left center bay
-
Set gyro switches for servo
type, servo direction, travel, delay
Final check on all internal pieces, add glue as needed.
Don’t skimp on glue.
Place main panels over wing jig for washout.
Fold over each top half, glue in place, hold while glue dries.
Trim excess foam off top trailing edge and top rear center section to match
bottom panel.
Using servo trailing edge mark, measure location forward for servo opening on
top of wing and mark.
Trim trailing edge to straight as needed.
Tape trailing edge with clear tape. Heat shrink as needed.
Tape top surface with clear tape starting at leading edge. Heat shrink as
needed.
Tape bottom surface with clear tape starting at leading edge. Heat shrink as
needed.
Cut out battery compartment using already built wings as guide.
Tape center and forward center sections with black or white duct tape, using
already built wings as guide.
Cut out left & right elevons (four pieces) using templates. Cut to keep markings
on inside. Glue each pair – doubled – with spray glue.
Cut left & right elevon leading edge bevel – bevel will be opposite each other.
Cut elevons trailing edge taper. Sand as needed.
Tape elevons with clear tape. Heat
shrink as needed.
Install elevons to wing trailing edge. Tape top and bottom hinge line.
Confirm good motion with no binding.
Cut out servo openings on top of wing, remove blue tape, pull out servo
extension.
Attach servo to extension, shrink wrap servo to extension, glue servo in place.
Install engine to engine mount as needed.
Glue engine mount to rear CF spar.
Drill four holes though engine mount into rear CF spar.
Add screws to engine mount into rear CF spar. CA screws.
Cut out radio hatch. Save hatch
piece to be tape hinged later.
Attach servos/gyros to Rx, with Rx outside of wing.
Solder ESC to battery and battery connectors as needed.
Attach ESC to motor. Install ESC to top of wing with Velcro.
Cut small hole for ESC to Rx wire.
Connect ESC to Rx, with Rx outside wing.
Plug main battery to ESC. Check RC operation of servos and motor (no
prop). Swap motor wires as
needed for proper rotation direction (unplug battery to swap motor wires).
Center servos. Add servo arms.
With gain all the way up for roll and pitch on Rx, confirm proper direction of
servo travel to Rx motion.
Confirm that stabilization can be turned off and on from radio.
Adjust gains to ~40%. Final tuning
of gains will be done after test flight.
Install Rx to wing with gain potentiometers accessible through hatch.
Tape hinge hatch.
Add linkage stopper to elevon horns.
Cut elevon horn slot directly behind servo arm.
Glue in CF elevon horns with linkage stopper already installed.
Add Z-bend at one end of linkage.
Add linkage from horns to servo arms, with Z-bend through servo arm.
Recheck RC operation of servos and elevons for no binding.
Center elevons at correct location using already built wings as guide.
Elevons will appear to be up.
Adjust servo travel as needed on radio.
Glue on wing tips.
Add Velcro/straps as needed for battery in battery compartment.
Add prop.
Add lead weight as needed for CG, using already built wings as guide.
Final check of operations and CG.
Don’t cut any fingers off.
Go fly.
Final tuning of gains will be done based on stabilization response in flight.
The orders have been made. (10Mar16)
One person among you had asked if I was regretting taking on this project. I responded that I had no regrets so far - that is until I started the ordering process. Depending on the warehouse (Hong Kong, US), Hobby King has some stuff available, some stuff on backorder, and some stuff with not quite enough stock for all of us. Unfortunately, you can’t jump back and forth between warehouses on the same order. I started with the Honk Kong warehouse, and everything was going well until I started hitting items that they did not have enough stock to cover everyone. After closing the almost completed order from Hong Kong and restarting in the US warehouse, I found that almost everything was available in the US warehouse; I only had to order the receivers from Hong Kong. Shipping was much less for the US warehouse, so it worked out well after all the changes.
The changes from original list are as follows:
· The 11x7 props I originally recommended were out of stock, so I got 12x6 props. Either prop will work fine.
· The 2650 3S 25C-50C lipo batteries I originally recommended were limited in stock, so I got a slightly better version for about $2 more / battery. The new batteries are the same capacity, but are rated up to 70C. The plane only needs about 20C discharge, but it does not hurt to have a slightly better battery.
· The pushrods I originally recommended were out of stock, so I got pushrod connectors and will buy some 2 mm steel rod from Home Depot.
I have bought all the local stuff from Home Depot and Target, so we are now just waiting for the electronics. I will let everyone know when the equipment arrives, and we can schedule the first build session as soon as possible after that.
I have the recommended ‘to buy list’ on this webpage below, and am adding updates each day as they happen. Please go through the list below and let me know which servos and receiver/stabilizer you want; that will determine your cost. My tentative schedule is to order all the electronics equipment on about March 7 for those who want me to order for them. That gives until the end of this week for people to respond, and gives me time to get money from whomever wants me to order the electronics for them. It should take about 2 weeks to get the stuff back from Hobby King, and the build sessions will be right after it arrives. I am going to build another 6’ wing out of pink foam along with everyone else, so we are all in this together. If you do order the equipment on your own, please do so before March 7 so we will all have the equipment at about the same time and can build the planes together.
The interest is greater than I had anticipated, which is great. I would love to see everyone in the club flying one of these things. Just imagine a sky of pink planes …
Because there are so many people, we will split up the building into two sessions, with half the group building their planes each time; i.e. you will only need to come to one session. Those two sessions could be on a Saturday and Sunday morning on one weekend, or across a couple weekends, whenever people are available. The first build session will depend on when all the equipment arrives from Chinafor the group, but expect that first build session to be around the end of March. All the tools and various parts we will need are in my large garage workshop, so if it is OK with everyone, we can do the build sessions at my house in Hereford, which is just south of the RC field. I have plenty of tabletop space for several people to build at once. The actual build will take a few hours, and since my house is close to the field, we can head from there to the field for test flights when we are done building.
This webpage also has photos of my other wings under construction, and details on the equipment needed, including the foam than can be used. The webpage is titled ‘Blue Wing’ as the first four flying wings I built were made of DOW BlueCor foam, but I am out of that blue foam and can’t locate it locally to buy new stock. The blue foam that Lowes currently sells does not work. Home Depot sells Owens Corning pink foam that works for RC construction, and I am currently building a 8.5’ flying wing out of that pink foam. Unless someone can find a new source for the DOW blue foam, the new wings to be built will be made from the Owens Corning pink foam from Home Depot.
The group build sessions will result in a flying wing ready to go for flight. If you want to add lights for night flying, a GoPro mount for aerial photos and video, or a video camera and video transmitter for FPV flying, I will be happy to help you out with that individually. I have each of those on different versions of the wing, and the wing is well suited for any of those additions. The GoPro mount, FPV camera equipment, and external LEDs can all be added after the plane is finished and flying. Internal LEDs take a while to solder in place and must be done as part of the construction.
Details on LEDs for night flying here http://chrisgood.co/rcplanes/night_flyers.html
Details on my FPV equipment here http://chrisgood.co/rcplanes/aerial_photos/video_downlink/video_downlink.html
GoPro aerial photos & video examples http://chrisgood.co/rcplanes/aerial_photos/
http://chrisgood.co/parks/CastleDome/
What to buy? I have used several different motors and ESCs for my various 6 foot wings, and they are all 350 – 400 watts running on 3S lipo batteries. Standard analog servos will work fine for this wing, but beefier digital servos will give crisper control. I use Futaba S-148 standard servos on 5 volts on my 6 foot wings, and JR DS841 digital servos on 6 volts on my 9 foot wing. You will also need battery connectors for the ESC and lipo battery. The battery comes with barrel connectors, so unless you buy the matching set of barrel connectors for the ESC, you should pick the same type connector you normally use for your other electric planes and solder on the appropriate matching sets. If you don’t have a preferred type, I recommend the XT60. I use Deans, but I have too many to change at this point. If you are not up on soldering, we can do the necessary soldering when we build the wing. Finally, choose your receiver with or without stabilization. I will supply the foam, carbon fiber, tape, hot melt glue, and engine mounts. I plan on going to the Lebanon RC Swap Meet on March 12, and will be picking up lots of hardware such as screws, pushrods, and clevises, so that will be taken care of also.
Suggested equipment:
Motor (370 watts) https://www.hobbyking.com/hobbyking/store/uh_viewItem.asp?idProduct=18229
Propeller (11x7 APC) https://www.hobbyking.com/hobbyking/store/uh_viewItem.asp?idProduct=22431
ESC (50 amp) https://www.hobbyking.com/hobbyking/store/uh_viewItem.asp?idProduct=24563
Lipo battery (2650 mah 3S) https://www.hobbyking.com/hobbyking/store/uh_viewItem.asp?idProduct=11915
Servos - need two (2) - pick a type:
- Analog servos https://www.hobbyking.com/hobbyking/store/uh_viewItem.asp?idProduct=16269
- Digital servos https://www.hobbyking.com/hobbyking/store/uh_viewItem.asp?idProduct=3743
Servo extensions – need two (2) https://www.hobbyking.com/hobbyking/store/uh_viewItem.asp?idProduct=9686
Connectors – pick a type:
- Deans (T-) connectors https://www.hobbyking.com/hobbyking/store/uh_viewItem.asp?idProduct=11981
- XT60 connectors https://www.hobbyking.com/hobbyking/store/uh_viewItem.asp?idProduct=9572
Pick one (1) receiver:
- Spectrum DSM2/DSMX 6ch receiver https://www.hobbyking.com/hobbyking/store/uh_viewItem.asp?idProduct=46632
- Spectrum DSM2 4ch receiver with stabilization https://www.hobbyking.com/hobbyking/store/uh_viewItem.asp?idProduct=39513
- Spectrum DSMX 6ch receiver with stabilization https://www.hobbyking.com/hobbyking/store/uh_viewItem.asp?idProduct=65572
- Futaba FHSS 7ch receiver https://www.hobbyking.com/hobbyking/store/uh_viewItem.asp?idProduct=78699
- Futaba FASST 8ch receiver https://www.hobbyking.com/hobbyking/store/uh_viewItem.asp?idProduct=78262
- Futaba FASST 7ch receiver with stabilization https://www.hobbyking.com/hobbyking/store/uh_viewItem.asp?idProduct=76252
More detail on receivers, stabilization, and additional electronics:
Hobby King DSM2/DSMX Rx - Spectrum / JR
http://www.hobbyking.com/hobbyking/store/__1796__1119__Radios_Receivers-DSMX_DSM2_Compatible.html
Hobby King DSMX Rx - Spectrum / JR
http://www.hobbyking.com/hobbyking/store/__1795__1119__Radios_Receivers-DSMX_Compatible.html
Hobby King FASST Rx – Futaba
http://www.hobbyking.com/hobbyking/store/__1799__1119__Radios_Receivers-FASST_Compatible.html
If you want
stabilization, it can be done via a couple different methods:
-
receiver with built-in 3-axis gyro stabilizer
- receiver + two gyros
I have used both of these paths, and they both work
great. I recommend a receiver with
built-in 3-axis stabilizer as the easiest and best method.
If you happen to have a receiver and two gyros sitting around unused,
that would also be an easy method.
This wing does NOT need stabilization, as it flies very well without it.
If you do want to fly with a camera or
VERY slow, it does help to have the stabilization.
Hobby King DSM2 stabilized receiver (6 channels)
Hobby King DMSX stabilized receiver (4 channel & 6
channel versions)
Hobby King FASST stabilized receiver
Hobby King 401B gyros (you would need two gyros)
http://www.hobbyking.com/hobbyking/store/__10113__Hobby_King_401B_AVCS_Digital_Head_Lock_Gyro_.html
You can also go all out and use an autopilot for full
self-leveling. The KK 2.1 board is a
self-leveling autopilot designed for use on multi-copters, and works great for
that purpose. The KK 2.1 has
software built into it to control lots of aircraft types, including flying
wings, but I have not done that to this plane yet, so we would be trying out
something new. There are several
methods to connect a receiver to the KK 2.1 board, all involving special cabling
and adaptors. Please contact me if
you are going this path and I can let you know what you will need.
http://www.hobbyking.com/hobbyking/store/RC_PRODUCT_SEARCH.asp?strSearch=kk+2.1
6 foot version
- two standard servos (Futaba S-148, or similar)
http://www.hobbyking.com/hobbyking/store/__290__189__Servos_Parts-Std_Servo_31_49g.html
- servo wiring extensions
- 450 size outrunner motor (450 watts)
http://www.hobbyking.com/hobbyking/store/__1217__517__Electric_Motors-35_to_44mm.html
- 40 amp ESC - with battery eliminator circuit (BEC) for power to Rx and servos
http://www.hobbyking.com/hobbyking/store/__454__182__Speed_Controllers_ESC_-40_to_79_Amp.html
- 2650 mah 3S lipo battery
http://www.hobbyking.com/hobbyking/store/__11915__Turnigy_nano_tech_2650mah_3S_25_50C_Lipo_Pack.html
9 foot version
- two high-torque servos ( JR DS841 on 6 volts, or
similar)
http://www.hobbyking.com/hobbyking/store/__291__189__Servos_Parts-X_Large_Servo_50gplus.html
- servo wiring extensions ( a bit longer)
- 32 size outrunner (750 watts)
http://www.hobbyking.com/hobbyking/store/__522__517__Electric_Motors-45_to_50mm.html
- 50 amp ESC – BEC not needed, so I recommend an opto-ESC that isolates the
motor from the Rx
http://www.hobbyking.com/hobbyking/store/__454__182__Speed_Controllers_ESC_-40_to_79_Amp.html
- switching power supply (SBEC) – the high torque servos need a separate power
supply, as an ESC with BEC cannot reliably give enough power
http://www.hobbyking.com/hobbyking/store/__10312__Turnigy_5A_8_26v_SBEC_for_Lipo.html
- 5000 mah 3S lipo battery -OR-
two 2650 mah 3S lipo batteries in
parallel
http://www.hobbyking.com/hobbyking/store/RC_PRODUCT_SEARCH.asp?strSearch=5000+3s
If you want lights:
- superbright LEDs – about 1 amp each, each super-bright LED also requires a
heatsink
http://www.ebay.com/sch/i.html?_odkw=10pcs+golden+22x22x10mm+Aluminum+Heat+Sink+High+Quality&_osacat=0&_from=R40&_trksid=p2045573.m570.l1313.TR0.TRC0.H0.X5pc+10Watt+10W+High+Power+Bright+LED+900LM+Bulb+10W+Cool+White+20000K+Lamp+Ligh.TRS0&_nkw=5pc+10Watt+10W+High+Power+Bright+LED+900LM+Bulb+10W+Cool+White+20000K+Lamp+Light&_sacat=0
- LED heatsinks
http://www.ebay.com/sch/i.html?_from=R40&_trksid=p2047675.m570.l1313.TR0.TRC0.H0.X10pcs+golden+22x22x10mm+Aluminum+Heat+Sink+High+Quality+.TRS0&_nkw=10pcs+golden+22x22x10mm+Aluminum+Heat+Sink+High+Quality+&_sacat=0
- RC switch - 10 amp for superbright LEDs
http://www.hobbyking.com/hobbyking/store/__8833__Turnigy_Receiver_Controlled_Switch.html
- LED strips - many colors available in 1 or 5 meter lengths
http://www.ebay.com/itm/5M-3528-5050-SMD-300-600-LED-Strip-Lighting-12V-FLEXIBLE-DIY-6-Colors-Wholesale-/181435517609?var=480407303326&hash=item2a3e664aa9:m:m_bllgtqfgAOmEdxfIP93qQ
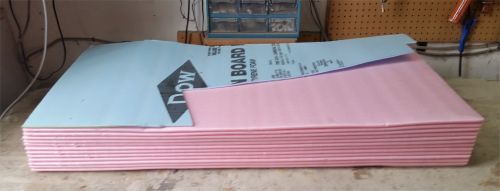
DOW BlueCor fan-fold [my last partial sheet] on top of Owens Corning Pink fan-fold
Foam Material
Lowes used to sell the DOW BlueCor fan-fold foam as a wall insulator,
but has moved to a different type of blue fan-fold foam insulation that is not
suitable for building RC airplanes.
Home Depot sells Owens Corning pink fan-fold which is the same structurally as
the good DOW BlueCor fan-fold, but is obviously pink.
Owens Corning pink fan-fold (available at Home Depot) - $52
for 25 sheets:
http://www.homedepot.com/p/Owens-Corning-FOAMULAR-1-4-in-x-4-ft-x-50-ft-R-1-Fanfold-Insulation-Sheathing-21UM/100320301?keyword=owens+corning+fan+fold
DOW BlueCor fan fold (used to be available at Lowes) - $50
for 25 sheets:
http://building.dow.com/en-us/products/bluecor-insulation/?sc_itemid=%7B1e0988e0-893e-4732-a210-12933af71df0%7D
A buried
web page PDF at Home Depot on-line actually lists the
DOW BlueCor as available by special order, but when I went into the store to
order it, they were unable to find it in their system.
Lowes now sells this stuff in all the stores I have looked,
but it is NOT suitable to use for RC
planes:
Pactiv R1 Faced Polystyrene Foam Insulation (.25” x 4’ x 50’ / 25 sheets 2’ wide
each)
http://www.lowes.com/pd_304092-210-100000050460___
Wing strength - carbon fiber strips glued to foam spars.
I have lots of these pulled from the trash of UAV construction, so
I have plenty of this for many wings.
Wing tips - realty chloroplast plastic signs painted black.
My wife used to be a realtor, so I have plenty of this for many wings.
Engine mount – carbon fiber sheet laminated with lite-ply.
I have plenty of this for many wings.
Misc: duct
tape, clear packing tape, hot melt glue, gorilla glue, servo pushrods and
clevises. I have some of this, but probably not enough for lots of wings.
Fan-Fold Flying Wings
This second half of the web page shows the wings I have built and their internal construction. The first five were made from blue fan-fold, and the last four were made from pink fan-fold.
BlueWing #1 - 6 foot wingspan, 480 outrunner, 40A ESC
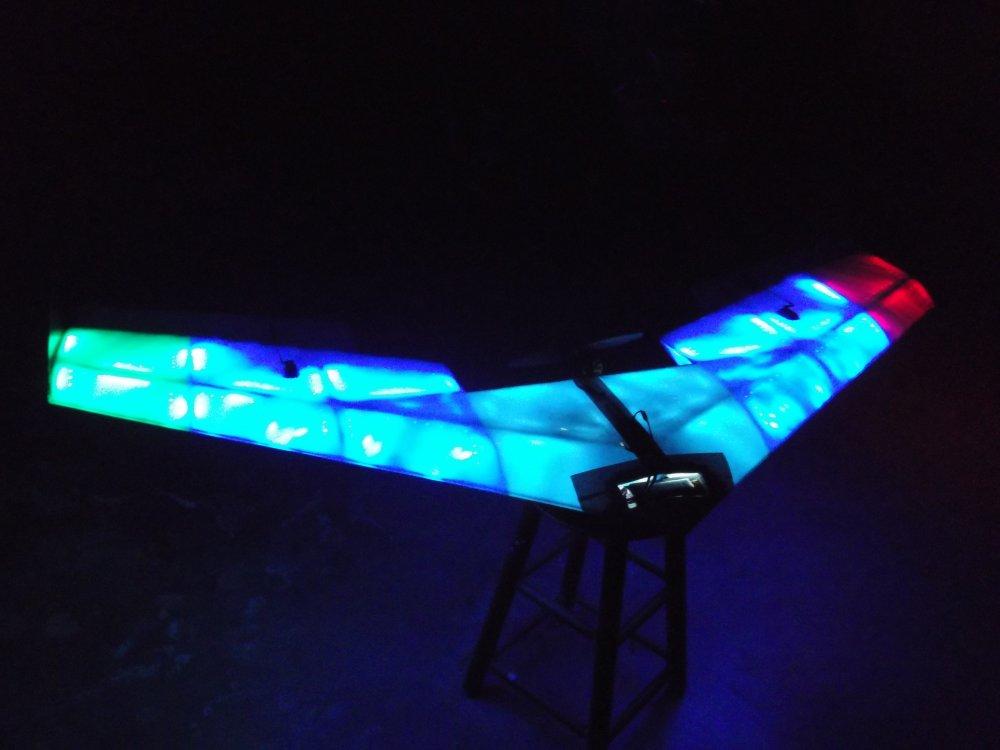
BlueWing #2 - 6 foot wingspan, 480 outrunner, 40A ESC, filled with hundreds of LEDs for night flying
BlueWing #3 - 6 foot wingspan, copy of #1, built for a friend (not pictured)
BlueWing #4 - 9 foot wingspan, EFlite 32 outrunner, 50A ESC
BlueWing #5 - 4.5 foot wingspan, 450 outrunner, 20A ESC
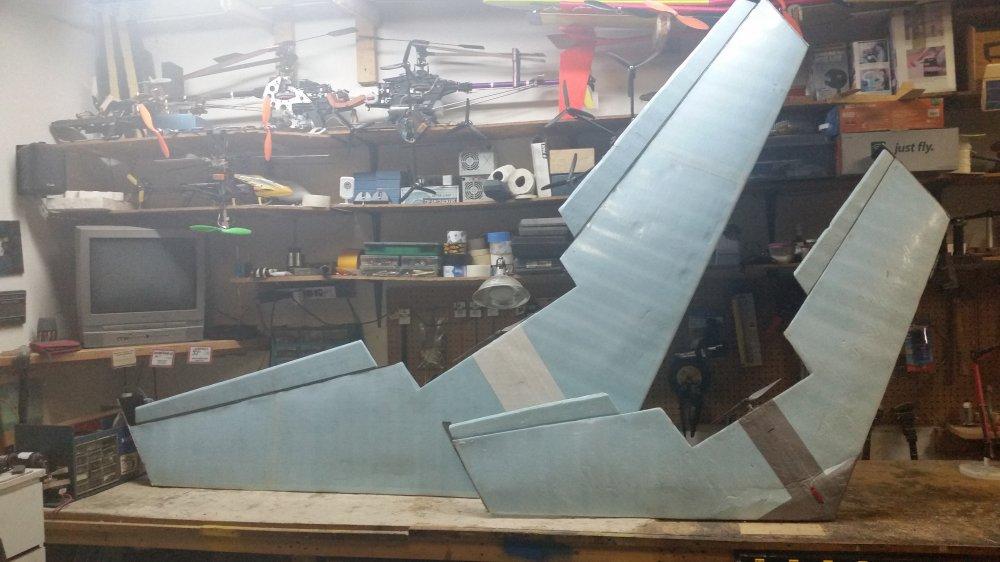
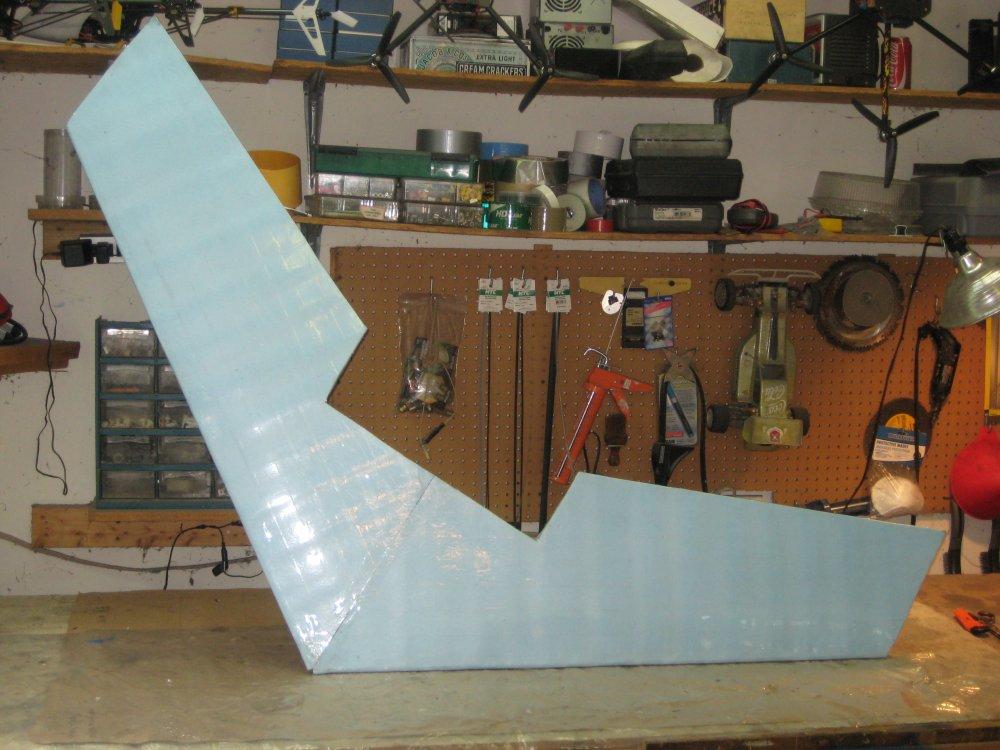
PinkWing #1 - 8.5 foot wingspan, 4.5" ducted fan, 9S battery, 60A ESC, 1700 watts at wide-open-throttle
PinkWing #2 - 6 foot wingspan, 480 outrunner, 50A ESC, built as part of a group build with my RC club
PinkWing #3 - 6 foot wingspan, 480 outrunner, 50A ESC, FPV plane with EagleTree system, details at the top of this page
PinkWing #4 - 6 foot wingspan, tilting tricopter, details at the top of this page and here
The first three
blue wings and all the pink wings have identical designs with 6 foot
wingspans. They are each powered by a 450 - 480 size outrunner motor (~450 watts), 40 amp
ESC, and 2560 mah 3S lipo battery. I
flew the #1 wing for a while to ring out the center of gravity, control throws, and
low speed handling until I was happy. I
then added a GoPro camera mount and a gyro on each control surface for
stabilization. This is the same as a
rate gyro on a helicopter’s tail servo (not in heading hold mode) – it steadies
the airplane in roll and pitch against sudden gusts while airborne, but is not
an autopilot that keeps the plane level.
I found that with the gyros in place, the video became much steadier in
all flying conditions. I have flown
this Blue Wing #1 at the RCMB field, and in West Virginia, California, Arizona, and Utah, and
have videos from many places. You
can see those videos here at
at my Aerial Photos and Videos web page about 2/3 of the way
down the page, under the title “GoPro Hero 3”.
Blue Wing #2 was built to be a night flyer, and the inside is covered
with hundreds of LEDs that make the flying wing glow at night.
Blue Wing #3 is identical to #1, and was built for a friend.
Blue Wing #4 is a scaled up version with a 9 foot wingspan.
It is powered by an EFlite 32 outrunner motor (~ 750 watts), 50 amp ESC,
and 5000mah 3S lipo battery. I also use
two 265omah 3S lipo batteries in parallel for power.
Blue Wing #4 has 6 super-bright LEDs that shine down through clear holes
in the bottom of the wing that make it very visible at high altitude, along with
red and green LED tip lights. The 6
super-bright LEDs, drawing almost 1 amp each, are controlled by a RC switch
rated at 10 amps. The LEDs are powered by
their own separate battery. I have also built
hardware to flash LEDs in sequence (like the NightRider car from the 80’s TV
show). There is lots more info on
that here at my Night Flyers web page.
The ducted fan pink wing, wing #5 has an 8.5 foot wingspan and is powered by a 4.5" electric ducted fan. It has a similar super-bright LED layout to #4 for visibility.
I have also added a small camera and 5.8 Ghz video downlink
to Blue Wing #1 for FPV flying.
Blue Wing #4 (9 foot wingspan) + Blue Wing #1 (6 foot
wingspan) for size comparison
At some point I swapped the two gyros on both Blue Wing #1 and #2 out for the HK V2.1 3-axis gyro stabilizer board that has the exact same function. The HK V2.1 3-axis gyro stabilization board is no longer sold by Hobby King. This is NOT the KK 2.1 board, which is the latest gyro and accelerometer flight controller used on multi-copters. The HK V 2.1 3-axis stabilizer board was originally made to stabilize multi-copters, but does not self-level, so it is not an autopilot. New software is available to allow it to work with normal planes and flying wings. I have recompiled that software with a few modifications to use on my flying wings, and I have the necessary hardware to flash that software to the board. I did this because I happened to have two of these boards sitting unused, and have included this info here in case someone else has one of these boards and wants to try this. See the picture below to see what this board looks like. There is more info on this stabilizer board here at my RC Electronics web page.
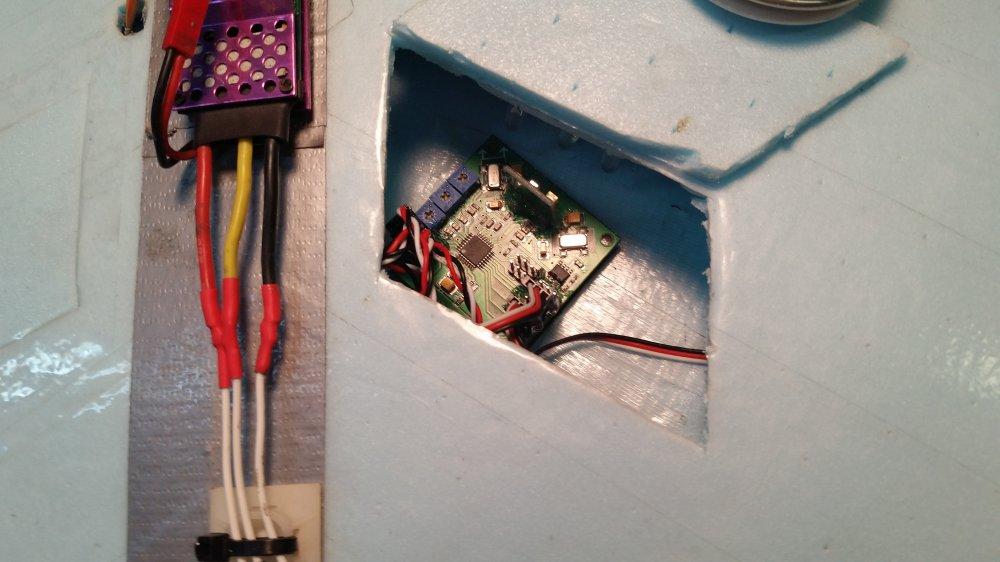
HK V2.1 stabilizer board installed in Blue Wing #2
Wing
construction:
Blue or pink fan-fold foam is used for the bottom and top
surfaces, wing spars, and wing ribs. Each 6 foot wingspan flying wing will use 4
sheets of foam. Each 9 foot wingspan
flying wing will use 6 sheets of foam.

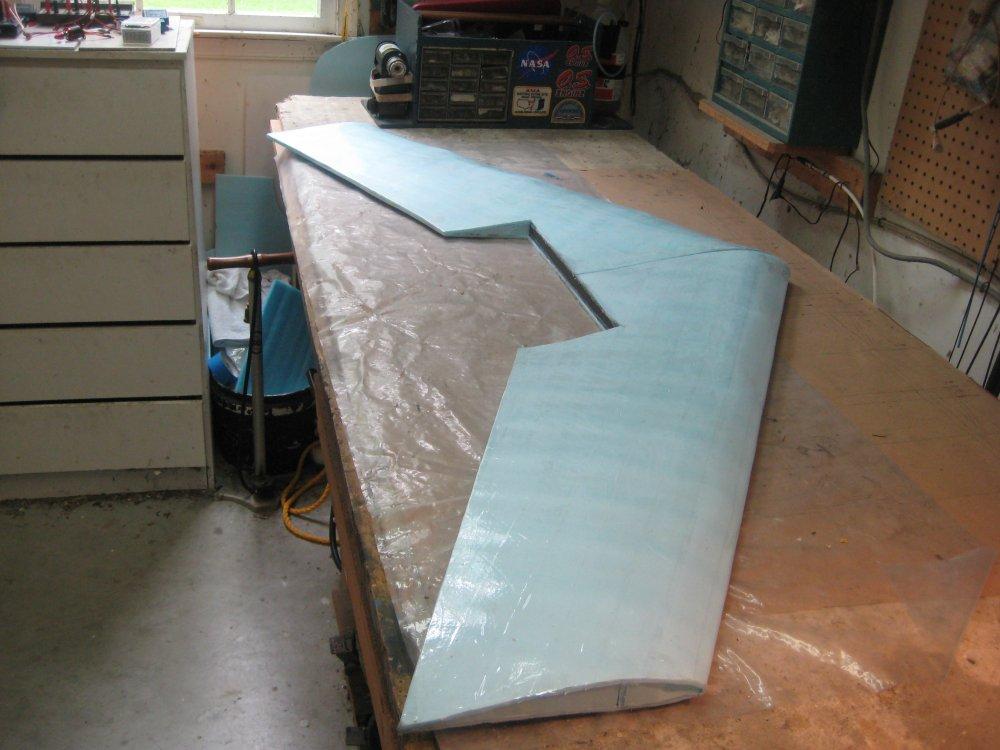
Blue Wing #3 (6
foot wingspan) - internal layout
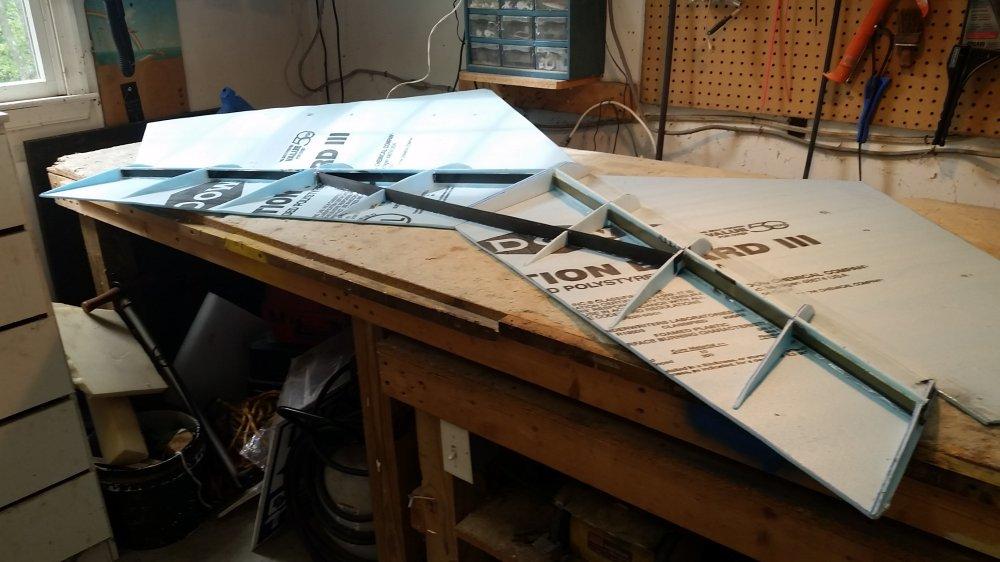
Blue Wing #4 (9 foot wingspan) – under construction - internal layout
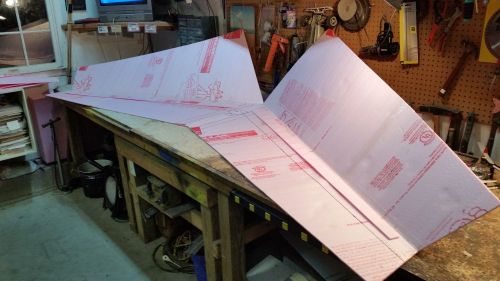
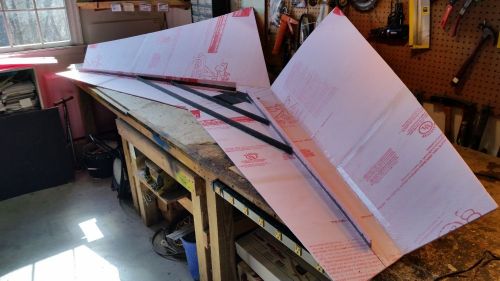
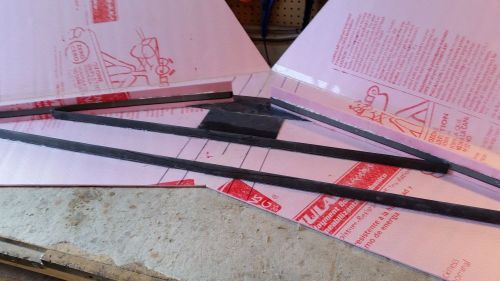
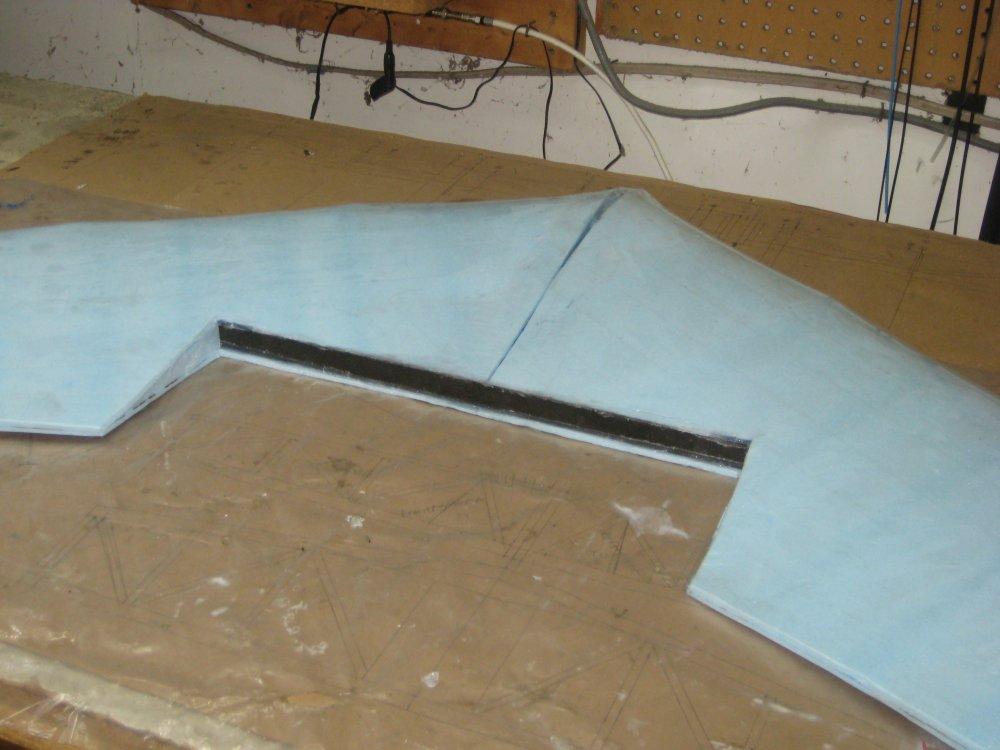
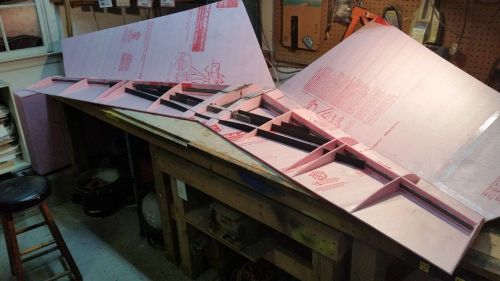
Pink Wing ducted fan - initial foam cut-out, main spars w/ carbon fiber, cross CF bracing
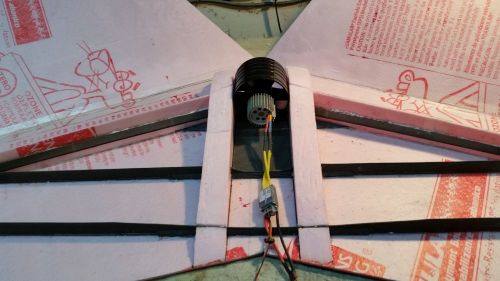

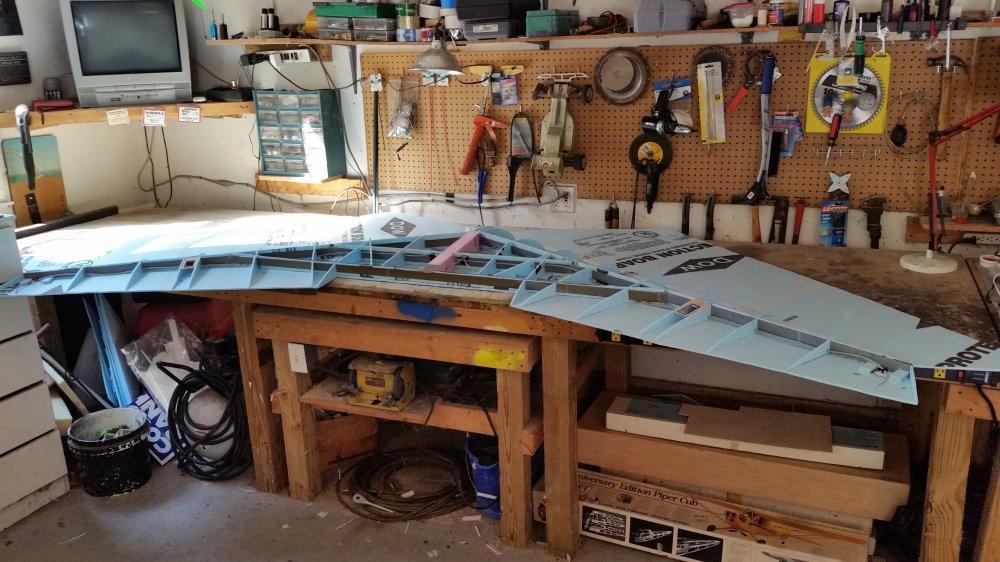
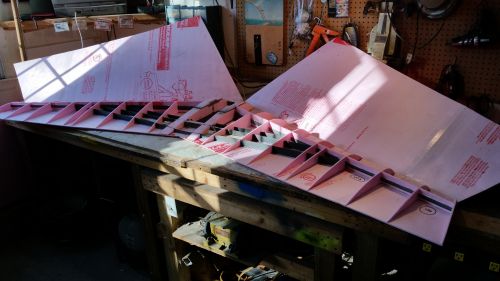
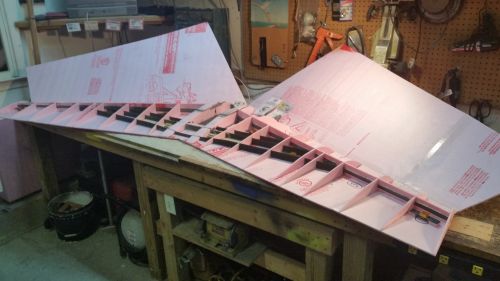
Pink Wing ducted fan - 4.75" fan + motor fit check, beginning of foam rib installation
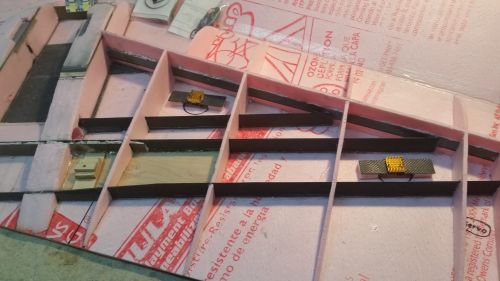
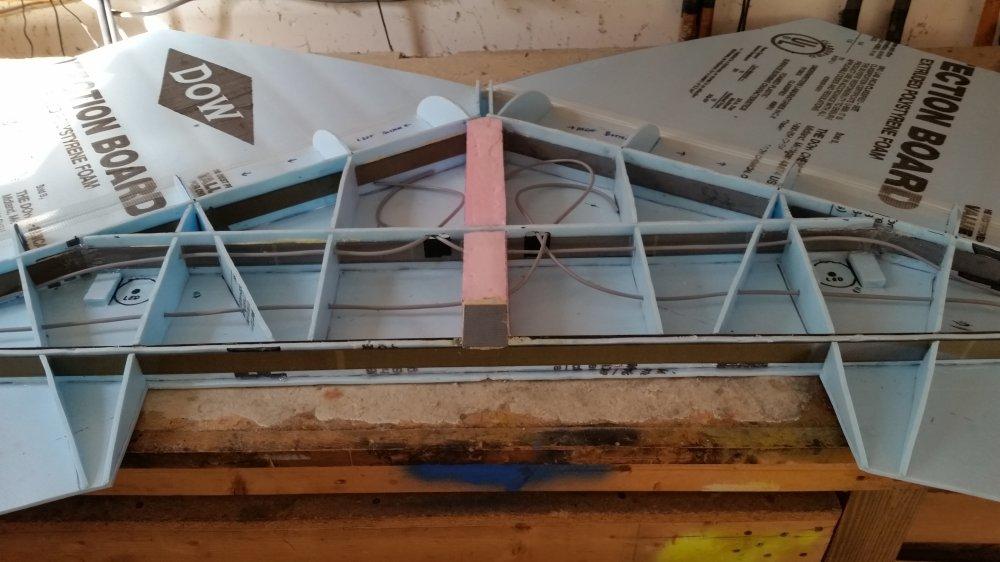
Pink Wing ducted fan - all foam ribs installed, fit check of super-bright LEDs; there are 6 super-bright LEDs facing down and 4 facing forward as landing lights