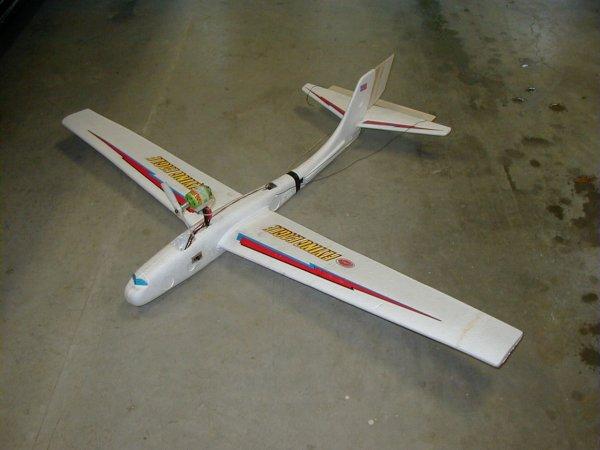

Foamy: The $8 Remote Control Airplane
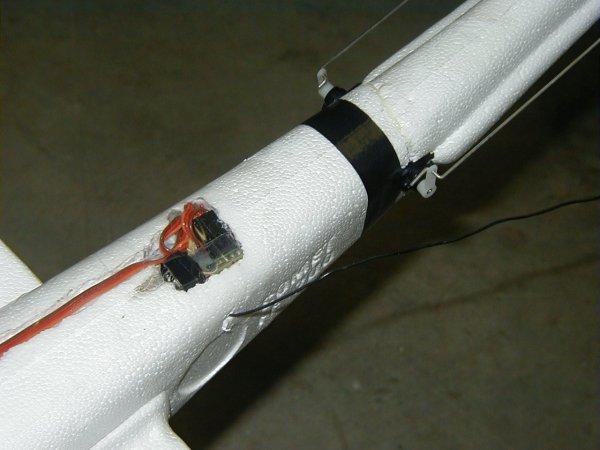 |
I started by cutting a small hole in the tail section to hold two servos. I ran the leads as far forward as they would go and cut another hole for the receiver. The receiver was covered over with clear packing tape. |
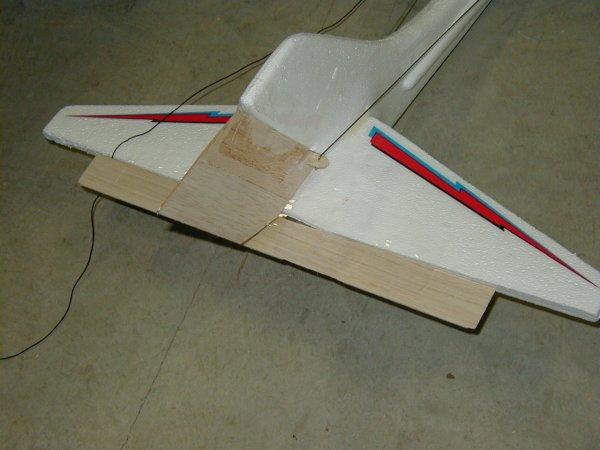 |
Now I needed to add the control surfaces. The horizontal stab is swept back from the center, so I needed to cut off the stab for a straight trailing edge. Using clear packing tape as hinges, top and bottom, I taped 1/16” balsa across the back as an elevator with a 1/16” balsa control horn. Duplicating this whole setup for the rudder, I then added small steel pushrods hanging out in the wind from the servos to the surfaces. |
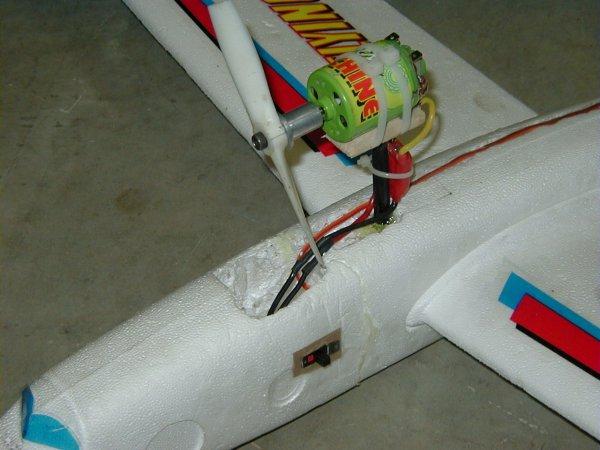 |
I put the engine on a pylon with a cut-off plastic prop and mounted the whole thing above the CG. The ESC is strapped to the pylon, and I balanced the plane for the battery by making a large hole just in front of the wing. The common thing to do would be to place the engine in the nose, but you don’t want to do that with these foam planes because the first time you touch down any harder than a feather floating to the ground, the foam nose will break off. |
The foam wings are designed to carry about zero load. All the stuff we have added makes the strength of those wings questionable. Put one or two layers of that same clear packing tape on the bottom surface of the wings. Tape the wings to the fuselage, or use white glue to do the same, as the wings have a tendency to slowly pull loose. Clean up the foam; the main wing airfoil and tail have almost square leading and trailing edges. Use sanding paper and smooth them to good airfoil shapes. Add some clear tape to the nose and underside as a belly skid. Put the stickers on that came with the plane and you are done.
Off to the field. No problem; the plane climbs quickly out of my hand and it flies almost hands-off without any trim adjustments. I can get 10 minute flights easily with 600 mah batteries. Remember not to do any aerobatics unless you really beef up the wings. They will flex and bend a lot in normal flight; a loop will snap them easily.
I fly this plane in small parks, the regular RC field, my front yard; wherever the mood strikes. I have had comments on how quiet it is; people who would not normally see a RC plane get exposure to the hobby. They love it when I tell them it cost me $8. I am careful to explain that was the plane price and the startup cost for all the rest of the equipment is a bit more.